

Revit would automatically snap to the centroid when placing a room. Instead, Revit just aligns adjacent elements. Since the reference crosshairs of the room are turned off by default, initially, the position of the room may seem irrelevant. However, when attempting to ‘tag all not tagged’, Revit will place tags at the room’s location. This constraint means that drawings can appear messy and illegible.
Centring rooms with Dynamo
To solve this issue, Parametric Monkey has developed a Dynamo graph, available as part of our Dynamo Package Development service. The graph moves selected rooms to the geometric centroid of the room. If the room is odd-shaped and the centroid falls outside the room boundary, the graph will keep the room’s current location. Note that any rooms within a model group will be excluded, as changes to groups are allowed only in group edit mode.

To run the graph:
- Select the rooms to be modified (#1). Selected elements that are not rooms are automatically filtered out.
- Press Run.
Centring room tags
Once all the rooms have been repositioned, it is possible to move any existing room tags to the new room location point. While it is possible to use the ‘tag all not tagged’ command within Revit, you may have some rooms that either don’t need tags or require a different tag family. By using Dynamo and referencing the tags already placed in the project, users have greater control over the outcome. Note that any room tags within a detail group will be excluded, as changes to groups are allowed only in group edit mode.
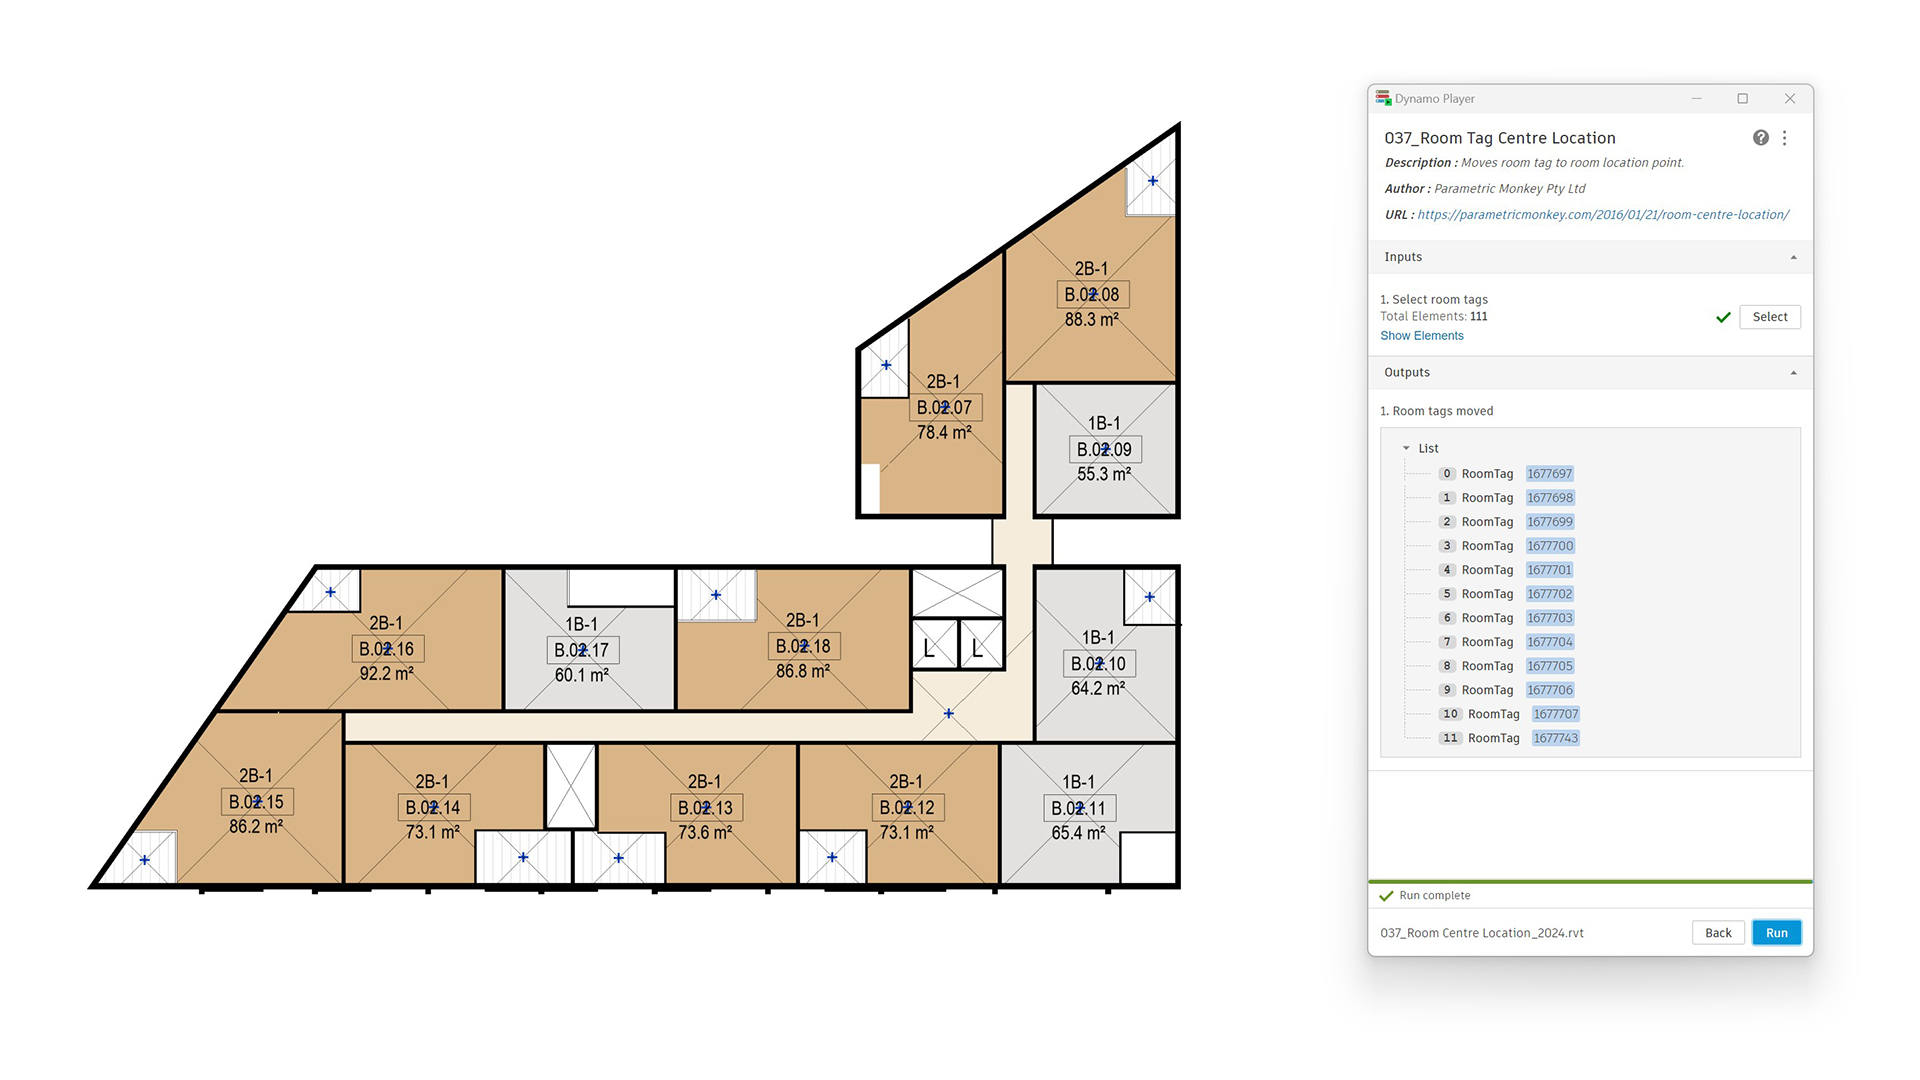
To run the graph:
- Select the room tags to be modified (#1). Selected elements that are not room tags are automatically filtered out.
- Press Run.


6 Comments
Rob Sawall
Any way this could be adapted to instead of shifting the room to its centroid, it could be leverage to report the placed center of room to obtain the length x width of its extents to that placed center location?
paulwintour
Hi Rob. Do you mean it reporting the rooms overall dimensions like 6x4m? This can be done by using a bounding box of the room. Or do you mean the width relative to the (uncentred) room location? This is possible too but how do you determine the width from the length? What scenario are you thinking of applying this to?
Rob Sawall
I’m thinking the way a slab direction tag works. This would allow you to grab length x width based on an uncentered non rectangular space easier.
paulwintour
I can look into it. Would it be better for the node to reference a detailed component, such as a setting out point, rather than the room?
Maarten van Zutphen
Hi Paul. Thanks for the great script. I noticed the script doesn’t include rooms within groups. I am
quite new to dynamo an figuring stuff out. Is there a way to include all the rooms (also from for example linked files)? Thanks in advance!
Paul Wintour
Hi Maarten.
That’s correct, it won’t work on model groups. And you won’t be able to run Dynamo when the group is in edit mode. This is just how the Revit API works, unfortunately.
It’s been discussed quite a bit on the forums already. The only real workaround is to ungroup, make the changes (with Dynamo), and then re-create the group but as you can imagine, there are lots that can go wrong with this process. You also won’t be able to edit any linked models. You’ll need to do this in the actual file.
https://thebuildingcoder.typepad.com/blog/2010/08/editing-elements-inside-groups.html