
Elk is a set of Grasshopper tools to generate a map and topographical surfaces using open source data from Open Street Map and Shuttle Radar Topography Mission (SRTM) data from USGS. It is developed by Timothy Logan and works similarly to @IT, Meerkat GIS and Flux’s Site Extractor. Elk has recently been rewritten from scratch and as such this tutorial will focus on the latest version, 2.2.2.
Open Streep Map export
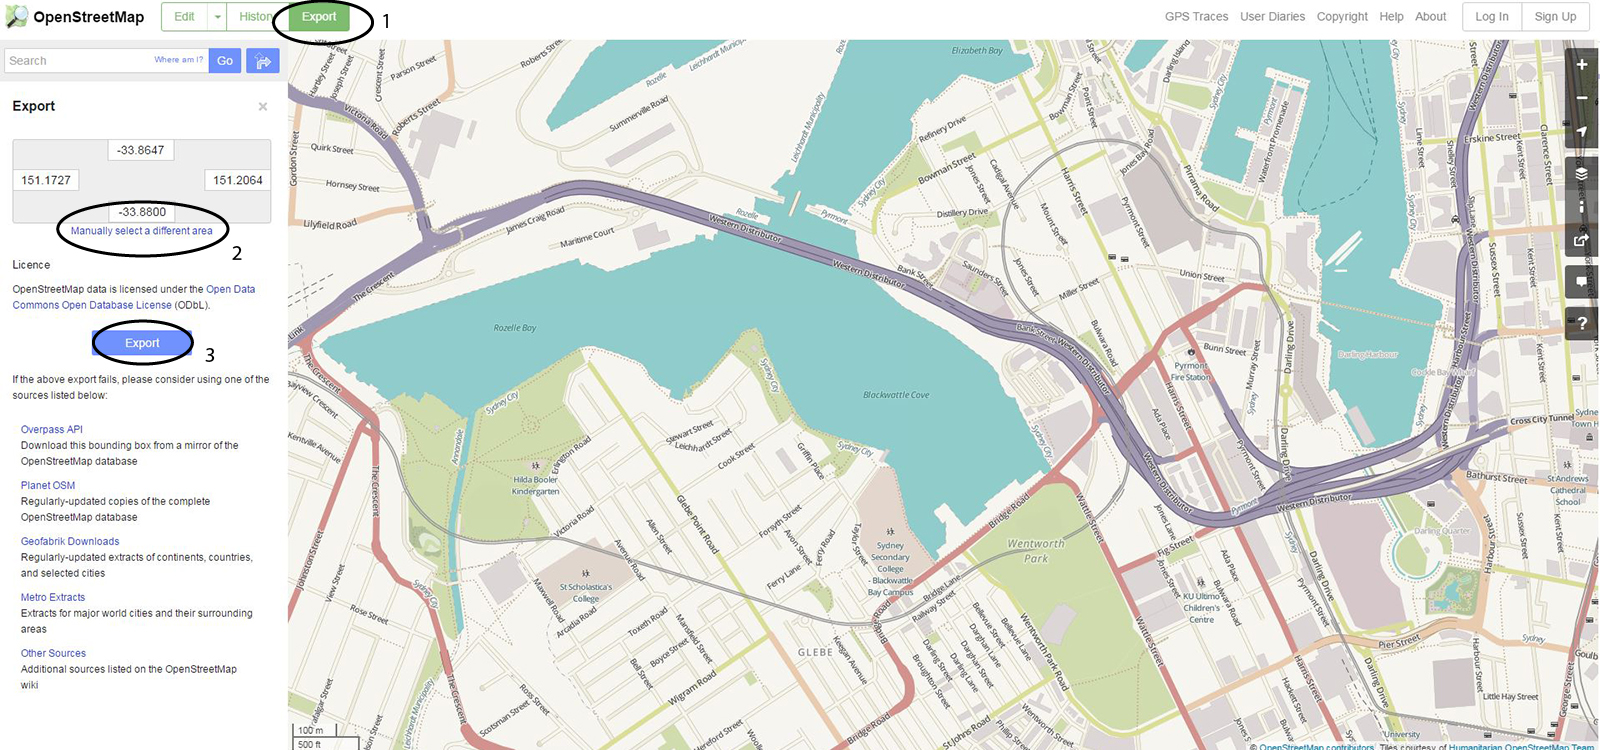
Before we can import any data into Grasshopper, we first need to export the data from Open Street Map (OSM). Once you have found your area of interest, select export up the top (1), then manually select a different area (2), then export (3). The export will create a file called ‘map.osm’ in your download folder which we can reference into Grasshopper.
Import OSM data
Within Grasshopper, we can use ‘File Path’ and ‘Location’ components to read the OSM data. The Location component converts the latitude and longitude locations point data based on the origin being the lower-left corner. For example, in the image above, the OSM data has a latitude domain of -33.8800 to -33.8647 and a longitude domain of 151.1727 to 151.2064. Therefore, the bottom left-hand corner of the window will correspond to -33.8800, 151.1727.

Feature type
Next, we can use the OSM data component to start organising and collecting the data from the OSM file. The component defaults to selecting building elements but can be changed to choose from any of the other map features in the OSM specification by right-clicking on the component.
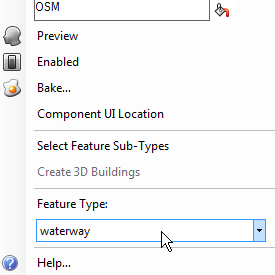
We can use the polyline component to draw closed polylines where possible. Note that although you may have selected specific categories to be extracted, such as ‘railway’, this is entirely dependent on the data coming out of Open Street Map. This limitation means that some of the OSM data components may be empty depending on your location.

Geo-reference model
Once the data is in Rhino, you can add a point at 0,0,0 and use Rhino’s ‘Earth Anchor Point’ command to assign the point to the desired latitude and longitude that we identified earlier, -33.8800, 151.1727. This process will georeference your model.
Topography
To generate a topography, Elk uses data that originates from the Shuttle Radar Topography Mission (SRTM) of 2000. The SRTM was flown aboard the space shuttle Endeavour from 11-22 February 2000. The National Aeronautics and Space Administration (NASA) and the National Geospatial-Intelligence Agency (NGA) participated in an international project to acquire radar data which were used to create the first near-global set of land elevations. Endeavour orbited Earth 16 times each day during the 11-day mission, completing 176 orbits. SRTM successfully collected radar data over 80% of the earth’s land surface between 60° north and 56° south latitude with data points posted every one arc-second (approximately 30 metres). This data was then packaged into 1° x 1° tiles.
The Topography component can be used to generate points, curves, and a surface from various Digital Elevation Model (DEM) file formats. Elk currently accepts:
IMG
*IMG files at a resolution of 1/3 arc second. The higher resolution IMG files are available for the United States only and can be downloaded from the USGS National Map Viewer. When searching for the data, choose Data > Elevation Products (3DEP), with a data extent of 1 x 1 degree and *IMG file format.

GeoTIFF
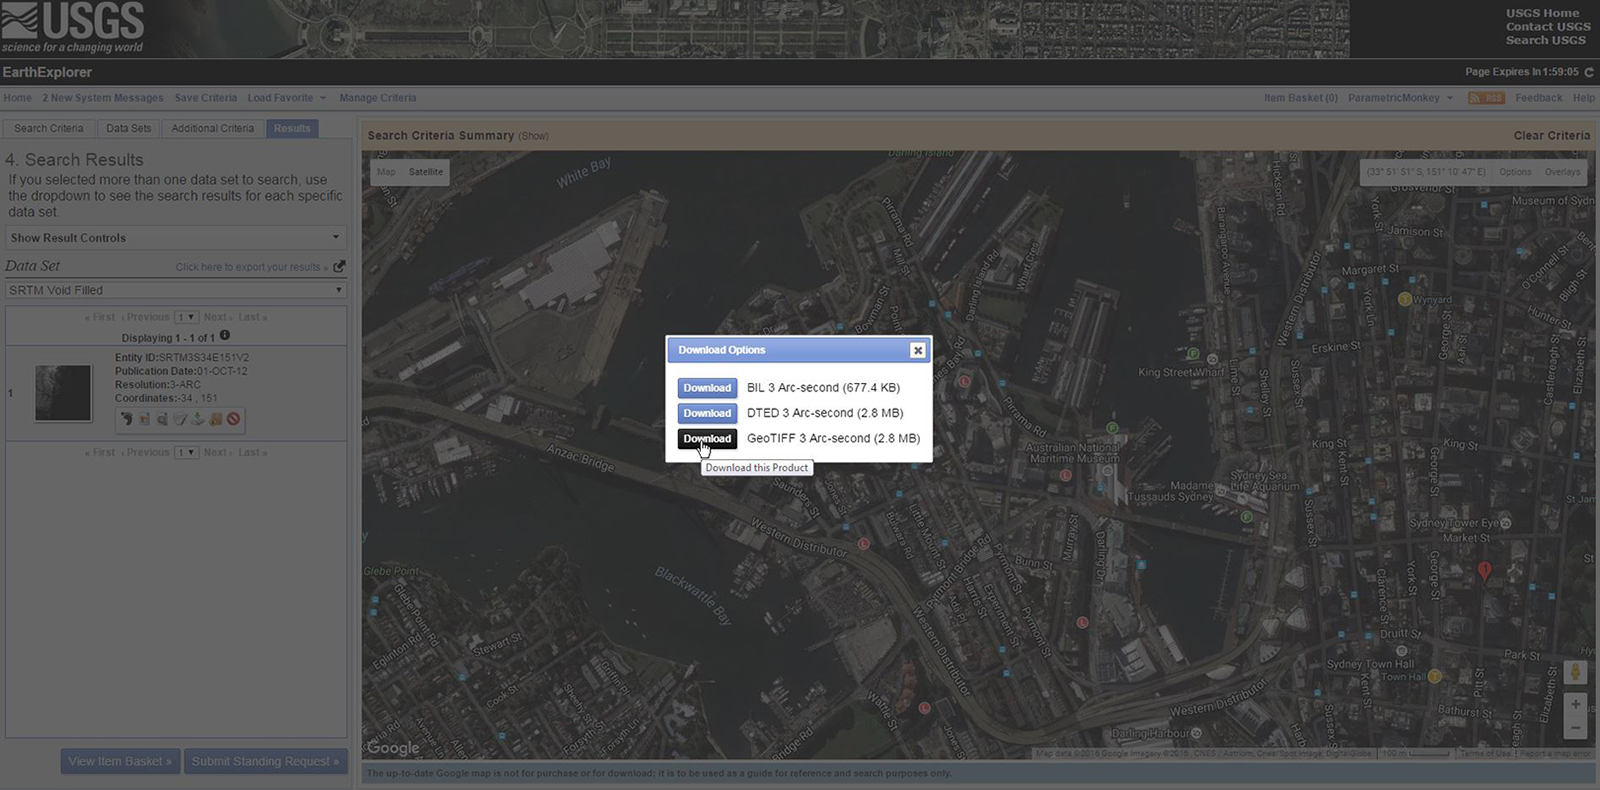
*GeoTIFF files at a resolution of 1 or 3 arc seconds. GeoTIFF files are available for 1 and 3 arc second resolutions for most of the earth and can be downloaded from the USGS Earth Explorer. This option is the best for data in Australia. When selecting your data sets, choose Digital Elevations > SRTM > SRTM Void Filled.
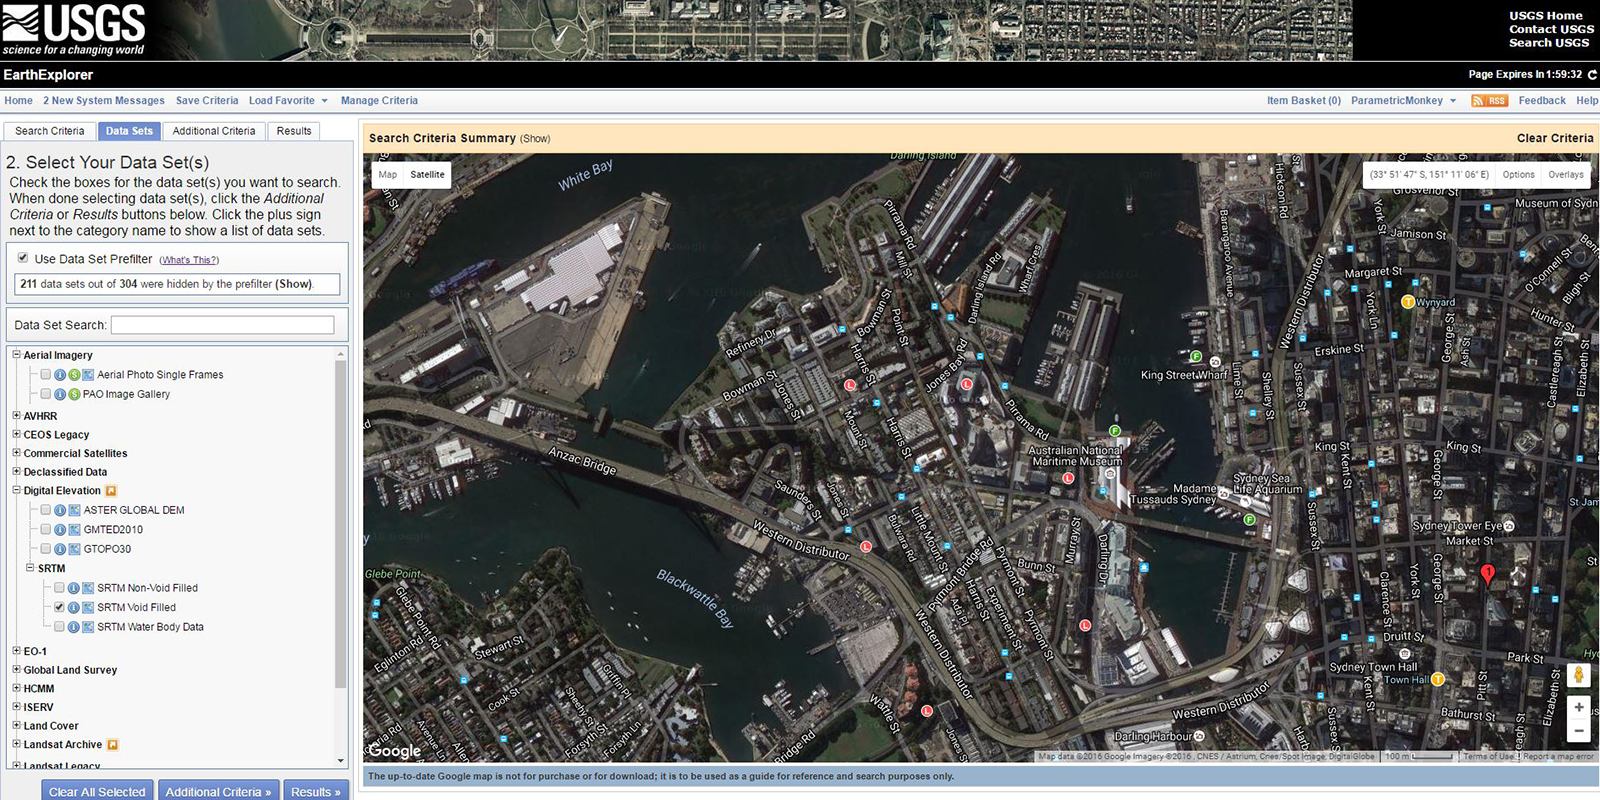
Once you have found your data set, go to results and download options and select GeoTIFF.
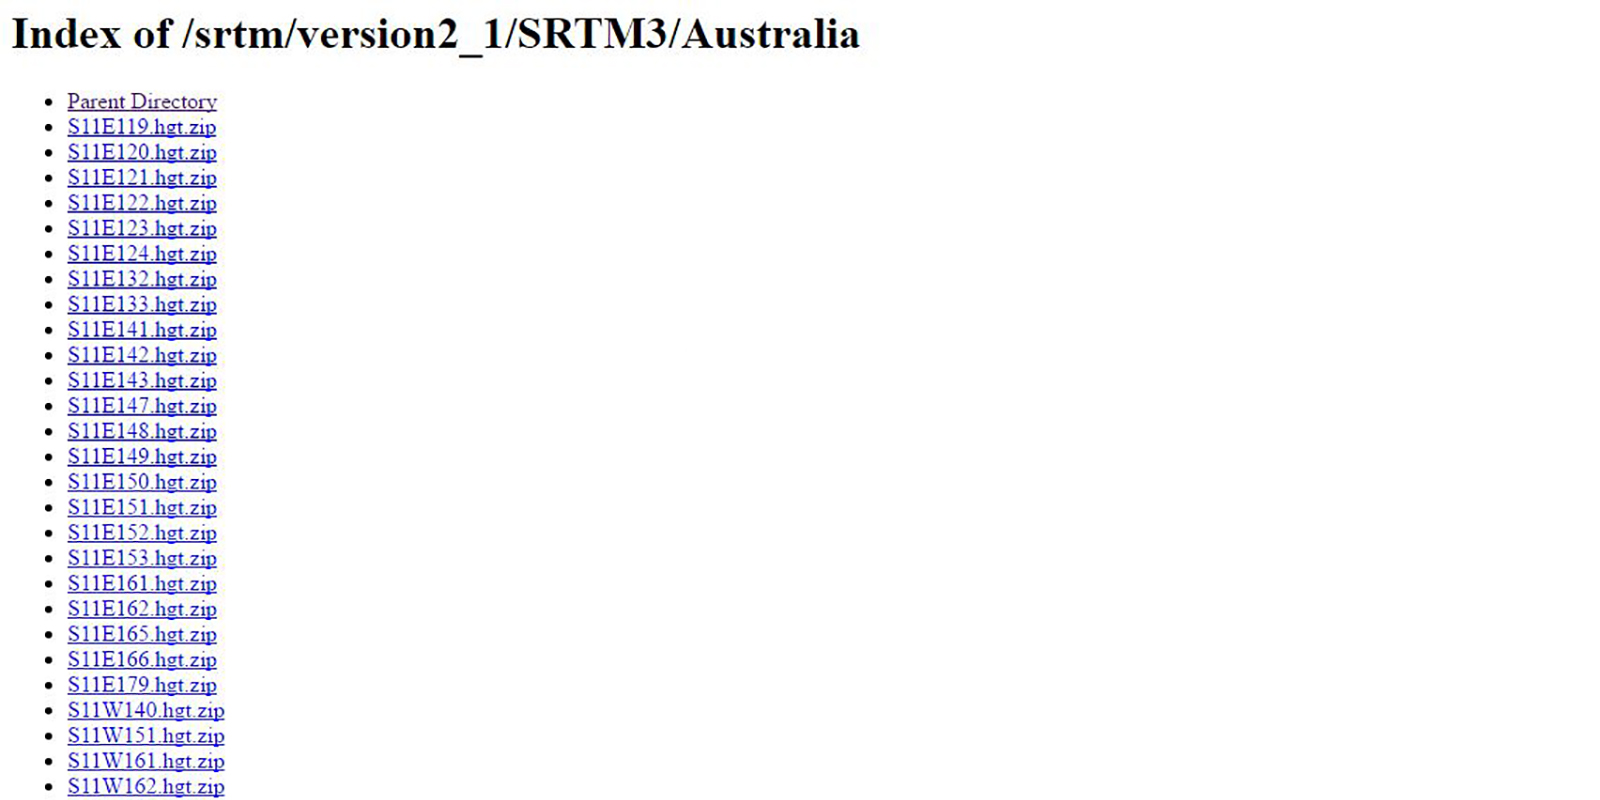
HGT
*HGT files at a resolution of 1 or 3 arc seconds. HGT files are the least reliable files as they tend to contain holes in the data. But they are the most basic form of DEM. The website is quite challenging to navigate, but for example, to access Sydney select Version2_1 > STRM3 > Australia > S34E151.hgt.zip. Ensure you unzip the file before trying to use it in Grasshopper.
Grasshopper script
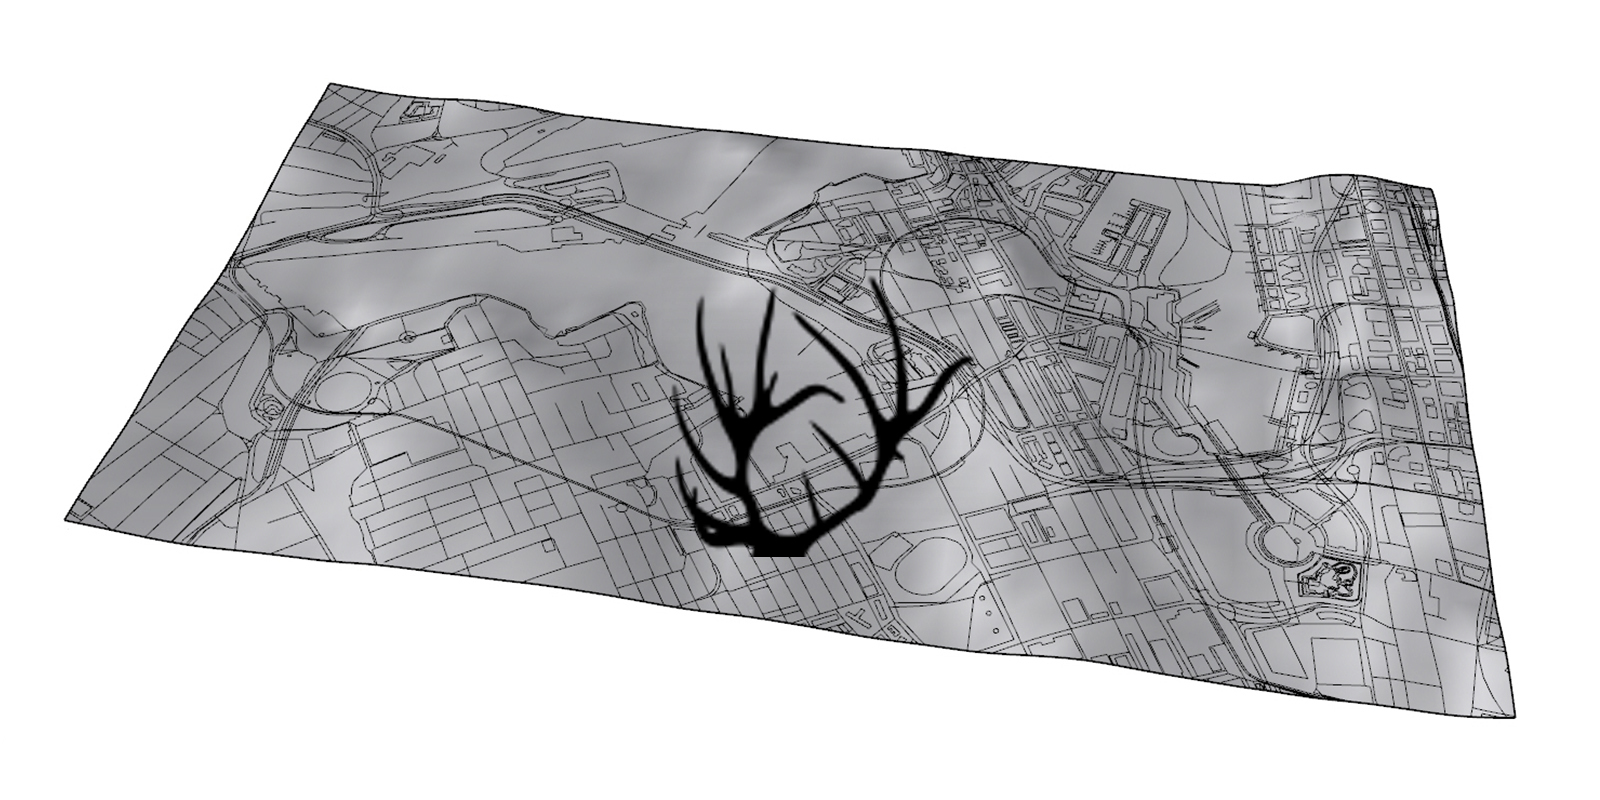
Once you have download one of the datasets, it is just a matter of a simple Grasshopper script. We can use the latitude and longitude from the Location component. The Topography component will output points, curves and surfaces. In the example below, I have flattened the points and used a Delaunay Mesh instead.

After generating your topography, you can bake all the geometry and project all the curves onto your surface.


