
When first creating a Revit model, it is known as a non-workshared model and behaves like any other commonly used file; only one person can edit it at any one time, and the file can be copied, pasted, and renamed freely. However, if you plan to work as part of a team on the same model, it is essential to set up a workshared model by enabling worksharing. Workshared models allow multiple to use the same model simultaneously. However, they also behave very differently from non-workshared models, as workshared models cannot be simply copied, pasted, and renamed.
Why amalgamating files doesn’t always work
New Revit users often assume that they will work on ‘their version’ of the model and copy and paste their work into the main model once their task is done. However, more often than not, this isn’t possible as Revit elements are mostly hosted and constrained by other elements. Copy/paste results, therefore, are not very reliable. This limitation means using a workshared model from the outset is best.
Purpose of worksets
Worksets, which are part of the worksharing process, allow you to divide up portions of the model along logical building divisions. Don’t think of these as layers; think of them more as building assemblies and components. Whereas in 2D CAD, you might have doors and walls as separate layers, in Revit, you might have the facade, core, and interiors as separate worksets.
Worksets are a powerful tool and act on many levels. On a large project, worksets allow team members to manage what goes into the active RAM on their workstations. Each workset can be selected to load or not load when you open a project. Think of this as partially opening a project. Leaving a workset off means you won’t load that information into the computer’s active memory, making the model easier to manipulate and manage. It will be ‘lighter’ and more responsive. Views will open quicker. And when you need to see your work in context with the other worksets, simply turn on the worksets that weren’t previously loaded. This workflow is a much more powerful way of controlling graphics than only using Visibility Graphics.

When working on a shared model, sometimes two people will try to edit the same element simultaneously. If desired, worksets can be used to ‘own’ an element, which prevents anyone from editing that element. Generally, however, it is recommended that you don’t ‘own’ a workset (or, in Revit’s terminology, make it ‘editable’). Instead, it is better to ‘borrow’ an element. When you edit an element that another team member is not editing, you automatically become the borrower of the element and can make the necessary changes.
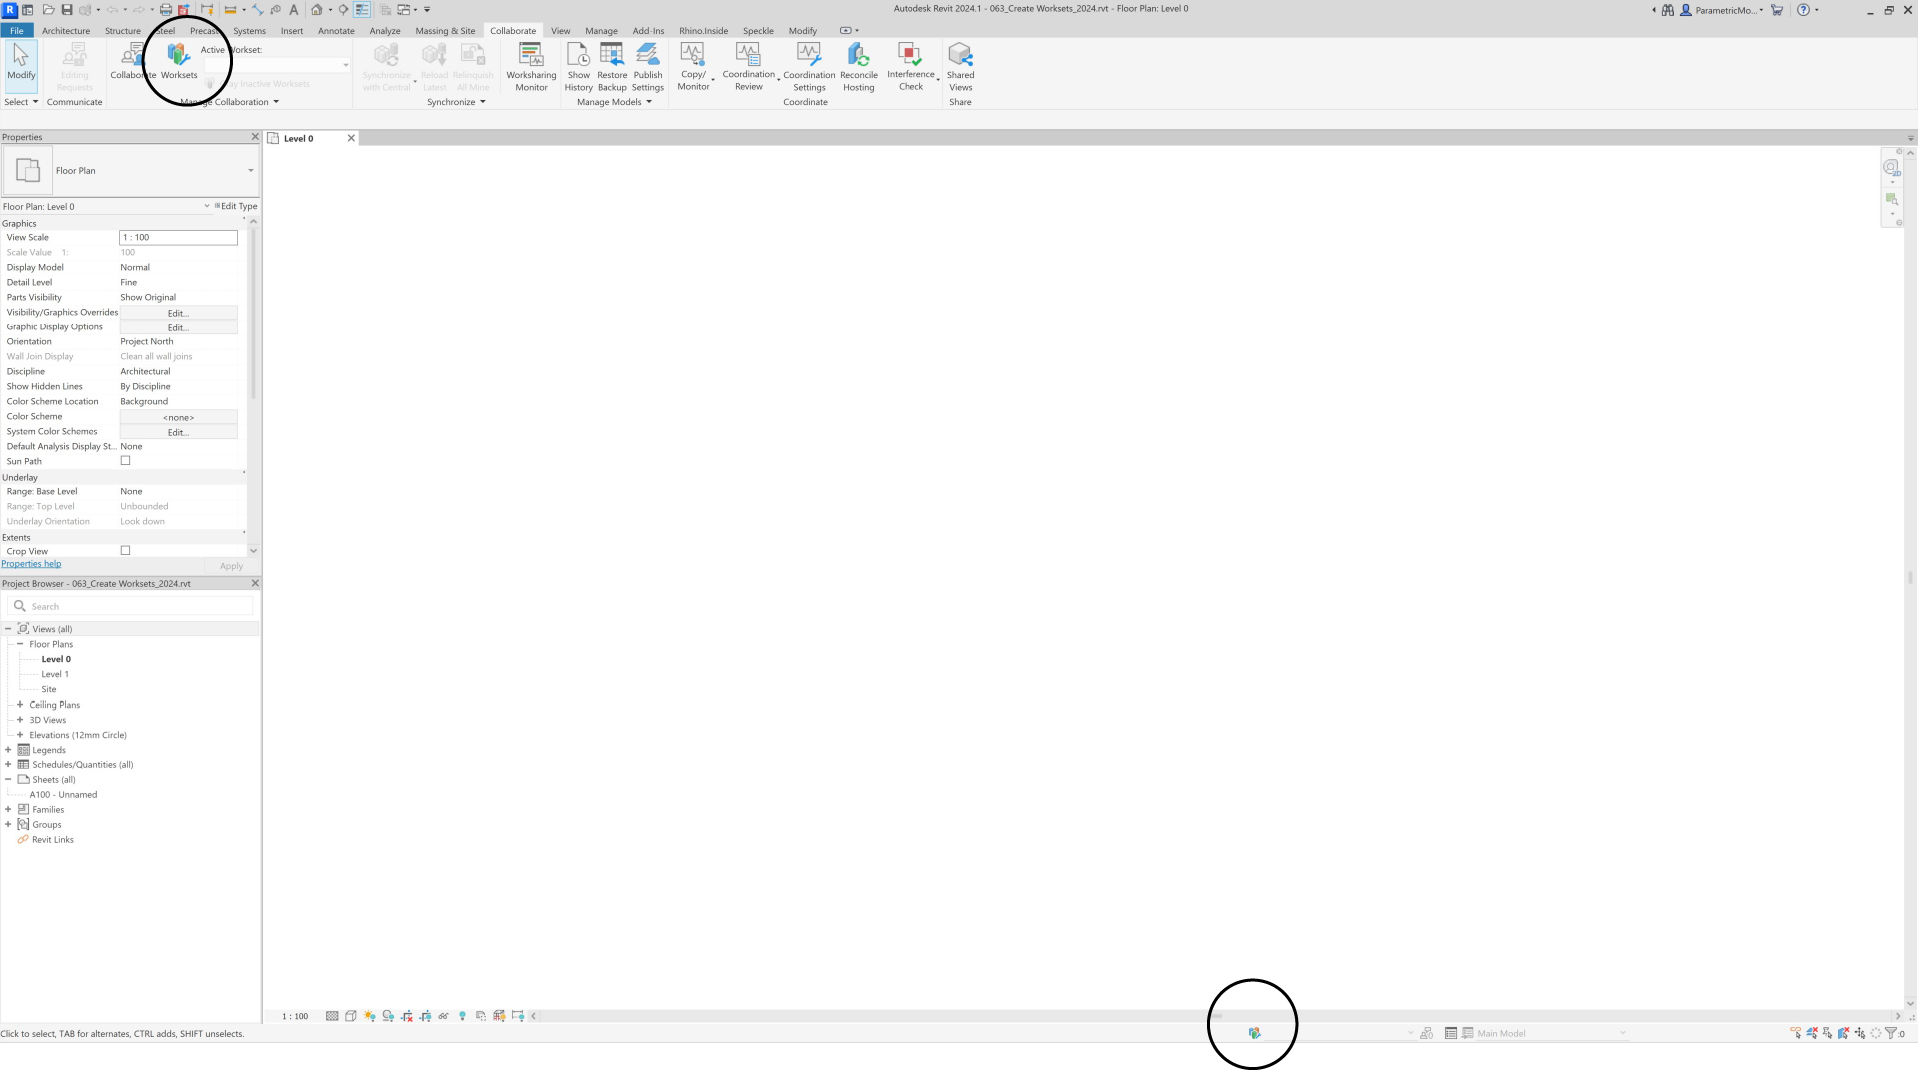
Enabling worksharing
To enable worksharing, click on the ‘Worksets’ button in the bottom ribbon, or alternatively, go to Collaborate > Manage Collaboration > Worksets.
Default worksets
Next, you will be prompted to name the default worksets and assign elements to these worksets. The default worksets are as follows:
- ‘Shared Levels and Grids’ – Contains all existing levels, grids and reference planes. Note that if you choose to collaborate using the cloud via BIM360, the workset will be named ‘Shared Views, Levels and Grids’.
- ‘Workset1’ – Contains all existing model elements in the project. Once created, this workset can be renamed but cannot be deleted.

Once enabled, additional worksets can be added or renamed to suit your organisation’s BIM standards. To automate this process, check out our create and rename workset tutorial, which uses Dynamo.

When saving the project, you will be warned that you are about to create a central model. Select ‘Yes’ to proceed.

Synchronize With Central
Once the central model has been created, you can then use the Synchronize With Central command and relinquish all the worksets you just created and hence own. Similarly, you can use the Synchronize With Central command when you are ready to publish your work to the central file for the rest of your team to see. Using Synchronize With Central also acquires all the changes that other team members have made and loads those into your local file. You can access this command in a couple of ways:
- Collaborate tab > Synchronize > Synchronize With Central.
- Use the Synchronize With Central button up in the top left. This button has a lightning bolt on it and is different from the standard save button, which only saves your local file without publishing to central.
For both options, ensure you check all the available checkboxes to relinquish elements so your teammates can work on them.

Local file
Now that you’ve made a central file, you must work in a Local File from now on. There are two main ways to do this:
Option 1: Copy central file
Firstly, you can simply open the network location of the central file and drag a copy from the network to your desktop or anywhere on your C: drive. Be careful not to move the file – only copy it. This option is fine, but you must repeat it each time you want to open the file so that when you open it, it will have the latest information from the Central file. Otherwise, there is a risk that your local file will be outdated and have trouble Synchronizing with Central.
Option 2 (Preferred): Open as a new local file
The second and preferred option is to use the open command, browse to the central file and open it. By default, it will be set to ‘Create New Local’. This setting prevents you from accidentally working in the central file, which can corrupt the file.

Conclusion
Working in a central model can be a scary experience for new Revit users. The main concern is not learning something new but rather the fear of corrupting or deleting their teammate’s work. However, mastering worksharing is a critical part of a high-functioning team and a necessary learning curve that you’ll need to negotiate.


3 Comments
andrealmeida
Do you know how sometimes edit request dialog box don’t work properly? You click on someone’s element, select request but element’s owner don’t receive the alert.
paulwintour
Hi Andrea. I haven’t seen this before. For the editing request to work, the other user has to have the file open. Are both of you in the same model at the same time? And are you using a normal server, not Dropbox or something similar?
Mark Mountain
yeah we get this. We found as the model got bigger it gets worse. We’re talking models approx. 400MB for large retail developments.
I suspect its down to model size and network speed. Fortunately we all work in one room together so its easy enough to turn around and shout “oi synchronise” to whoever has borrowed the workset.