

When designing apartments, often it is necessary to know the area and dimensions of balconies for planning compliance. However, to make things difficult, these requirements are often based on the apartment’s dwelling type and/or location. This tutorial demonstrates how to automate the compliance process, such as that required by SEPP65 and the Apartment Design Guide, by verifying the minimum balcony area and depth.
Background
Understanding the area and dimensions of an apartment balcony is often required for compliance testing. For example, section 4E of the NSW Apartment Design Guide requires that minimum areas and depths be achieved for private open areas based on the dwelling type:
| Dwelling type | Minimum area | Minimum depth |
|---|---|---|
| Studio apartments | 4m2 | – |
| 1 bedroom apartments | 8m2 | 2m |
| 2 bedroom apartments | 10m2 | 2m |
| 3+ bedroom apartments | 12m2 | 2.4m |
Additionally, there are requirements relating to the minimum balcony depth (1m) that can be counted as contributing to the balcony area. Moreover, a terrace can be provided for apartments at ground level or on a podium, in which case it must have a minimum area of 15m2 and a minimum depth of 3m.
Prerequisites
Before any analyses can be undertaken, it is first necessary to isolate the balconies and terraces. But moreover, we need to find their associated apartment to identify its dwelling type – 1 bed, 2 bed, etc. However, it is not easy to ‘pair’ rooms within Revit. Instead, it is necessary to rely on naming conventions to provide some level of association between elements. The ‘Renumber balconies‘ graph does just this by establishing a naming convention that allows any subsequent graph to quickly and easily re-identify room pairs. As such, before running the graph, ensure that the ‘Renumber Balconies‘ graph has been run.
Minimum balcony area and depth compliance with Dynamo
Our ‘Balcony size’ Dynamo graph, which is available as part of our Dynamo Package Development service, automates this compliance process. Two shared parameters are needed to store the rooms’ minimum area and depth compliance. These parameters should be of type yes/no and assigned to the Room category. In the example below, we’ve used ‘0_Min area comply’ and ‘0_Min depth comply’. If rooms are nested in a model group, the parameter should also be set as ‘values can vary by group instance’. To calculate the depth, the room must contain a door or a curtain panel classified as either a curtain panel or a door.
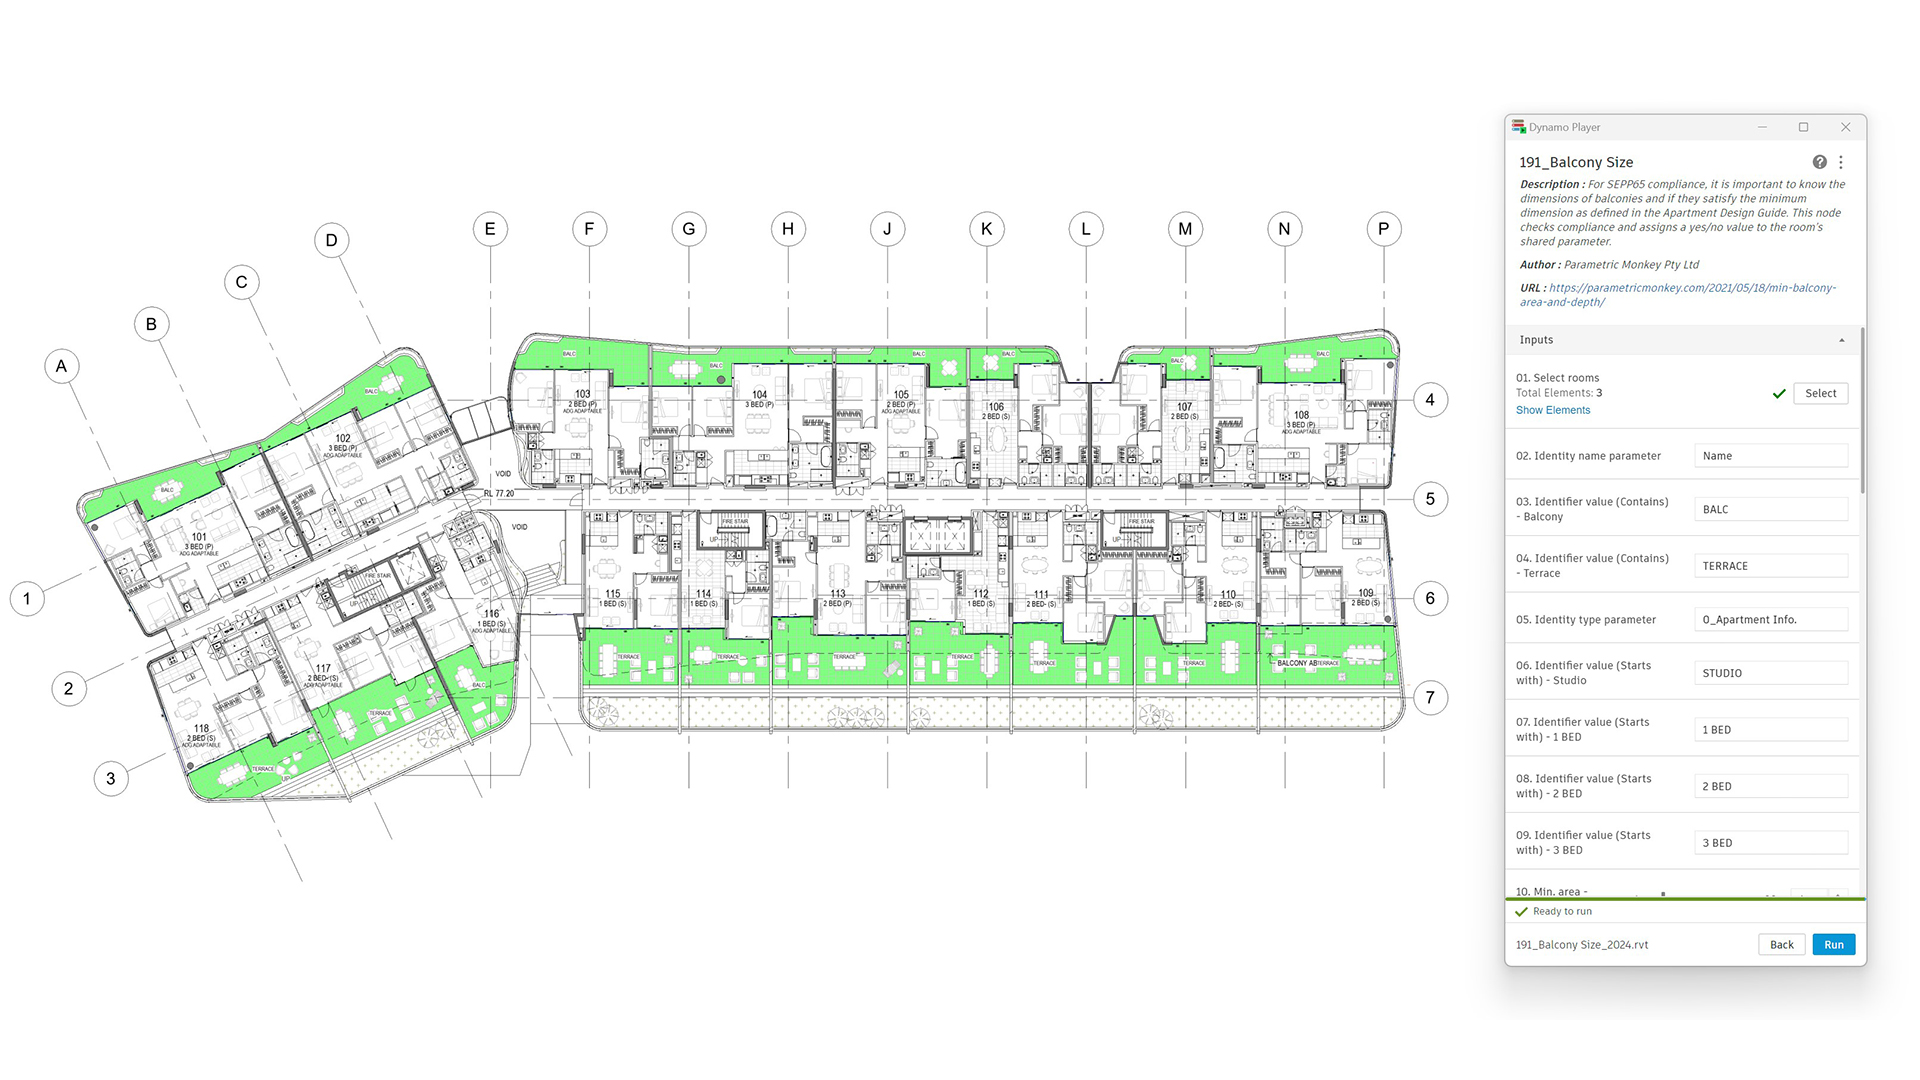
To run the graph:
Room selection
- Select the rooms to be analysed (#1). Elements not of category room will be automatically filtered out.
- Specify the room parameter to identify if the room is a balcony/terrace (#2). Typically, this will be ‘Name’. If using a shared parameter, it should be of type Text.
- Define the parameter value (contains) to identify balconies (#3). For example, “BALC”. The value is not case-sensitive.
- Define the parameter value (contains) to identify terraces (#4). For example, “TERRACE”. The value is not case-sensitive.
- Specify the room parameter to identify the dwelling type (#5). The value is not case-sensitive. Note that this parameter can be populated by running the ‘Renumber Balconies‘ graph in advance.
- Define the parameter value (starts with) to identify the associated dwelling type (#6 – #9). Note that these values are only critical for balconies, as terraces have a fixed minimum depth and area regardless of the associated dwelling type.
Minimum areas
- Define the minimum compliance area for each dwelling type (#10 – #14).
- Specify the shared parameter for the minimum area compliance (#15). The parameter should be of type Yes/no and assigned to the Room category.
Minimum depth
- Define the minimum compliance depth for each dwelling type (#16 – #20).
- Define the minimum depth to be counted as contributing to the minimum area compliance (#21).
- Specify the shared parameter for the minimum depth compliance (#22). The parameter should be of type Yes/no and assigned to the Room category.
- [Optional] Specify the Family Type that defines the balcony door if a curtain panel of category curtain panel has been used (#23).
- Press Run.

Tip: To visualise the results, create a colour scheme, assign it to the view, and ensure the ‘Room – Color fill’ category is enabled in Visibility Graphics.

Computational logic
Selected rooms (input #1) are filtered to return only placed and bounded rooms. Next, the rooms are grouped based on the room parameter (input #2), with only rooms that contain the specified values (inputs #3 & #4) returned. Balcony rooms are further differentiated based on their dwelling type parameter (input #5). To be classified, the parameter value must start with the values defined in inputs #6 – #9. The value is not case-sensitive. For example, a match will still be found if the room parameter is ‘2 Bed adaptive’ but ‘2 BED’ is specified in Dynamo Player.
Minimum area
Once classified, the room’s area is checked against the minimum area requirements (input #10 – #14). Complying rooms have their minimum area compliance parameter (input #15) set to ‘Yes’, while non-complying rooms, including excluded rooms, are set to ‘No’. If the parameters can not be found, an error is returned.
Minimum depth
The graph checks each balcony/terrace room and returns the doors, curtain panels classified as doors, and curtain panels classified as curtain panels (as identified by input #23). Next, the centre point of these elements is geometrically calculated and used to check the balcony/terrace depth. Only the balcony/terrace’s external perimeter is used – any internal islands, such as room bounding columns, are excluded.
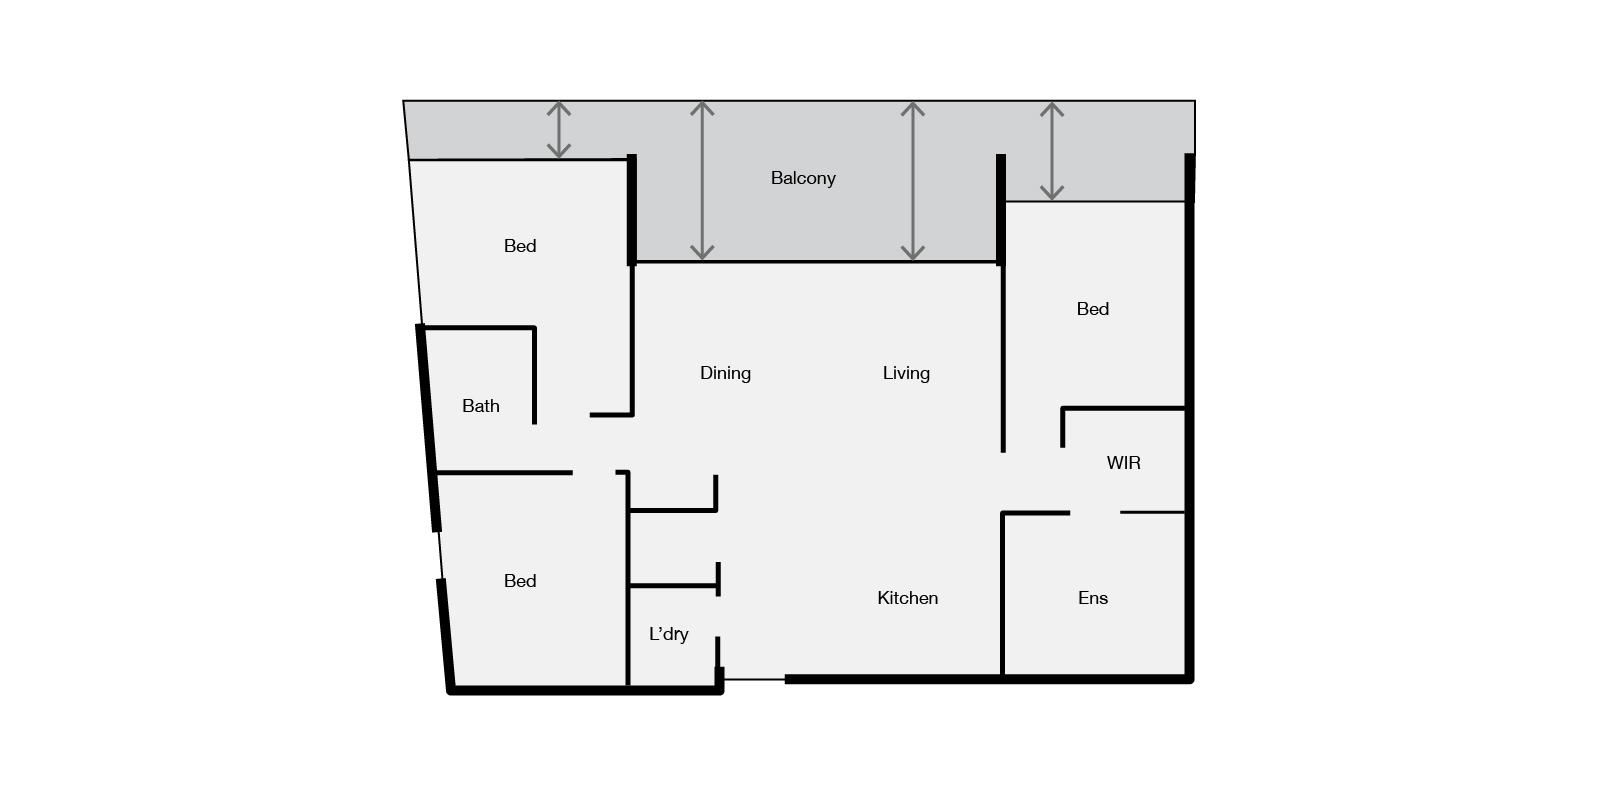
If multiple doors open out onto the balcony/terrace, the graph will return the deepest value. This value is then checked against the minimum depth requirements. Complying rooms are returned separately, and their minimum depth compliance parameter is updated to ‘Yes’. If the parameters can not be found, an error is returned. Balconies and terraces that do not meet the minimum depth are returned separately, and their minimum depth compliance parameter is updated to ‘No’.
Limitations
The balcony/terrace depth is calculated only at a single point and not across the entire length. Additionally, the graph does not consider the minimum balcony/terrace depth to be counted as contributing to the balcony area. Instead, the graph flags potentially problematic elements for manual review. Problematic rooms are defined as those rooms with a depth less than the minimum allowable threshold (input #21) in front of any door. In this scenario, the user should add room separation lines to remove the area below the threshold and re-run the graph.
Conclusion
The requirements of section 4E of the NSW Apartment Design Guide, which relate to achieving minimum areas and depths of private open areas, means that compliance checking can be a slow and tedious task. However, as this tutorial demonstrates, much of this process can be automated using Dynamo. To find out more about this graph or our Dynamo Package Development service, drop us a line and discover how we can automate your Revit workflows.


2 Comments
Simmi George
How I can get this graph
Paul Wintour
Hi Simmi. This is a paid script. If you would like to know more, including the price, please email me, and I’ll be happy to assist.