
A catenary is the curve a hanging flexible wire or chain assumes when supported at its ends and acted upon by a uniform gravitational force. The curve has a U-like shape, superficially similar in appearance to a parabola, but it is not a parabola. The word catenary is derived from the Latin word for ‘chain.’ The curve is also called the alysoid and chainette.
One of the most well-known architectural examples of catenaries is Antonio Gaudi’s hanging-chain models. Gaudi’s method exploits the property of a catenary curve, which describes a chain in pure tension. When the catenary is inverted, it becomes a curve in pure compression.

Within Rhino, catenaries can be generated using either Grasshopper’s inbuilt component or via the Kangaroo plug-in. Grasshopper’s catenary component is more accurate as it is calculated mathematically. Kangaroo, on the other hand, is a live physics engine and will, therefore, give an approximation of the catenary curve. Note that the Kangaroo examples shown below are using version 0.099. If you are using the latest version, 2.02, you’ll need to modify the definitions substantially.
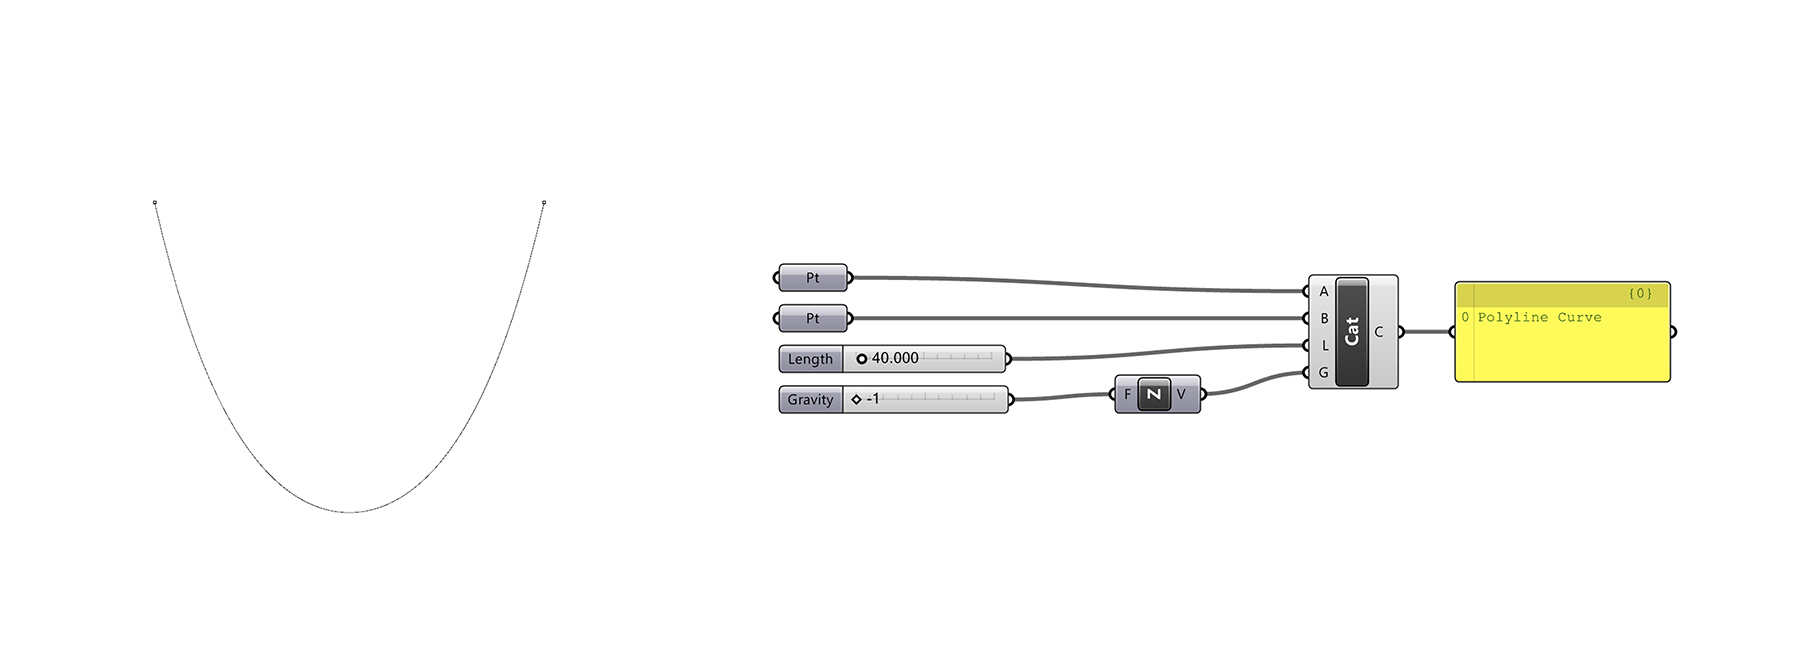
Grasshopper’s catenary component
For simple definitions, it is easier to use the Grasshopper catenary component. For this to work, ensure that the length of the catenary curve is greater than the distance |AB|. To get a hanging chain effect, set the gravity vector to 0,0,-1. To invert the curve, set the gravity vector to 0,0,1.
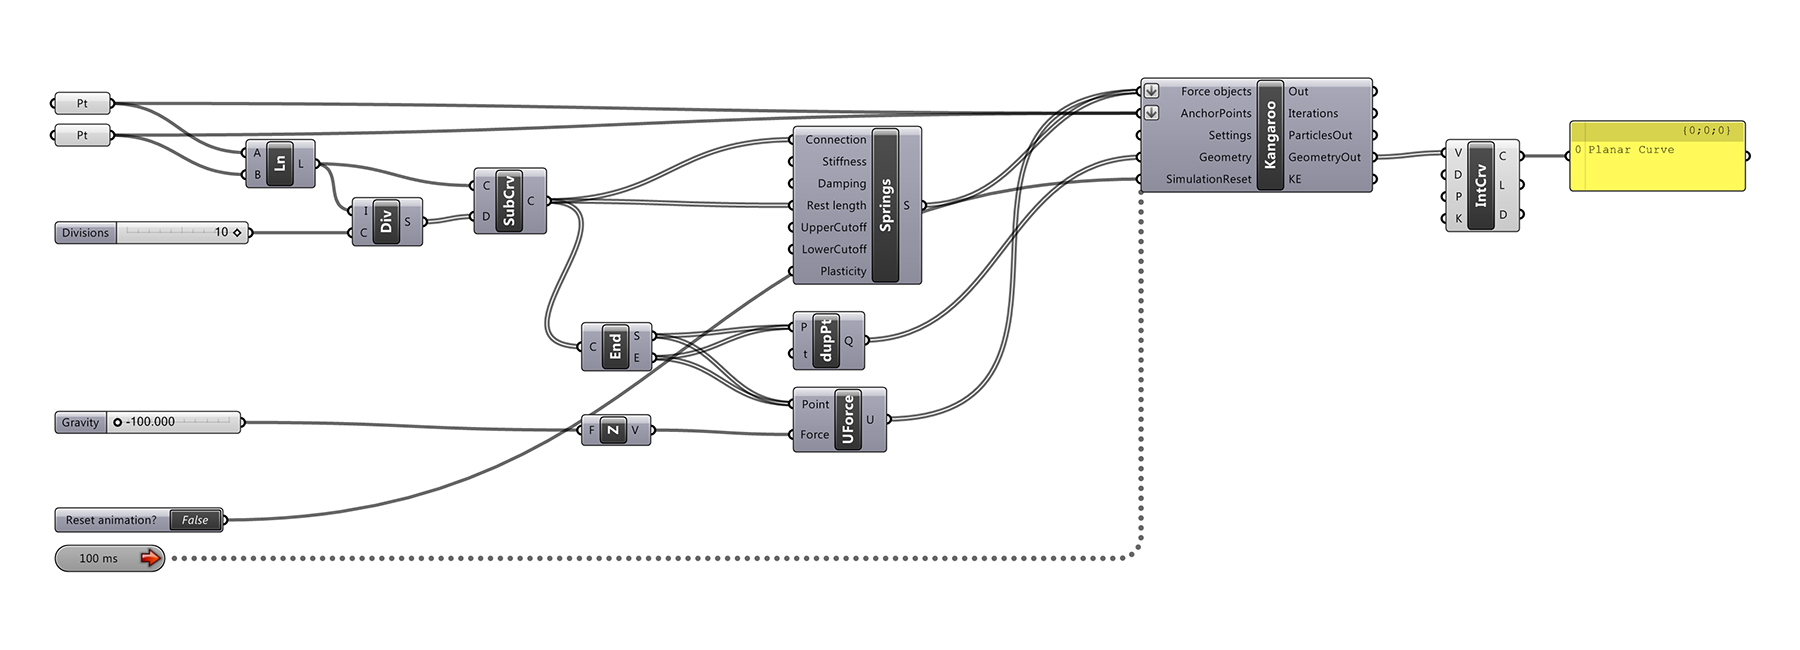
Catenary curve using Kangaroo
To create a simple catenary curve using Kangaroo, firstly reference two Rhino points. These will be the anchor points for the simulation. Ensure these points are flattened when connecting them to the ‘AnchorPoints’ input. Next we need to apply a force to this line generated from these two points. Since the force we require is gravity, we can apply a ‘Unary’ force to it. However, to make the element flexible so that we get the hanging chain effect, we must first subdivide the line into smaller pieces and model each segment as a separate spring force at each of these ‘kinks’. We can then extract the start and endpoints of each of these kinks. Since some of the points will be coincident, we can use the ‘removeDuplicatePts’ component to simplify the geometry.
Although we have a Unary force already applied, we also need to create a spring force between each kink. Note there is no Kangaroo input for the start length of a spring – it merely uses the length of the curve input to springs. The rest length of the spring, also called natural or slack length, is the length it ‘wants’ to be. Ensure that the force objects input is flattened. Finally, connect a timer and a Boolean toggle for the simulation to run.
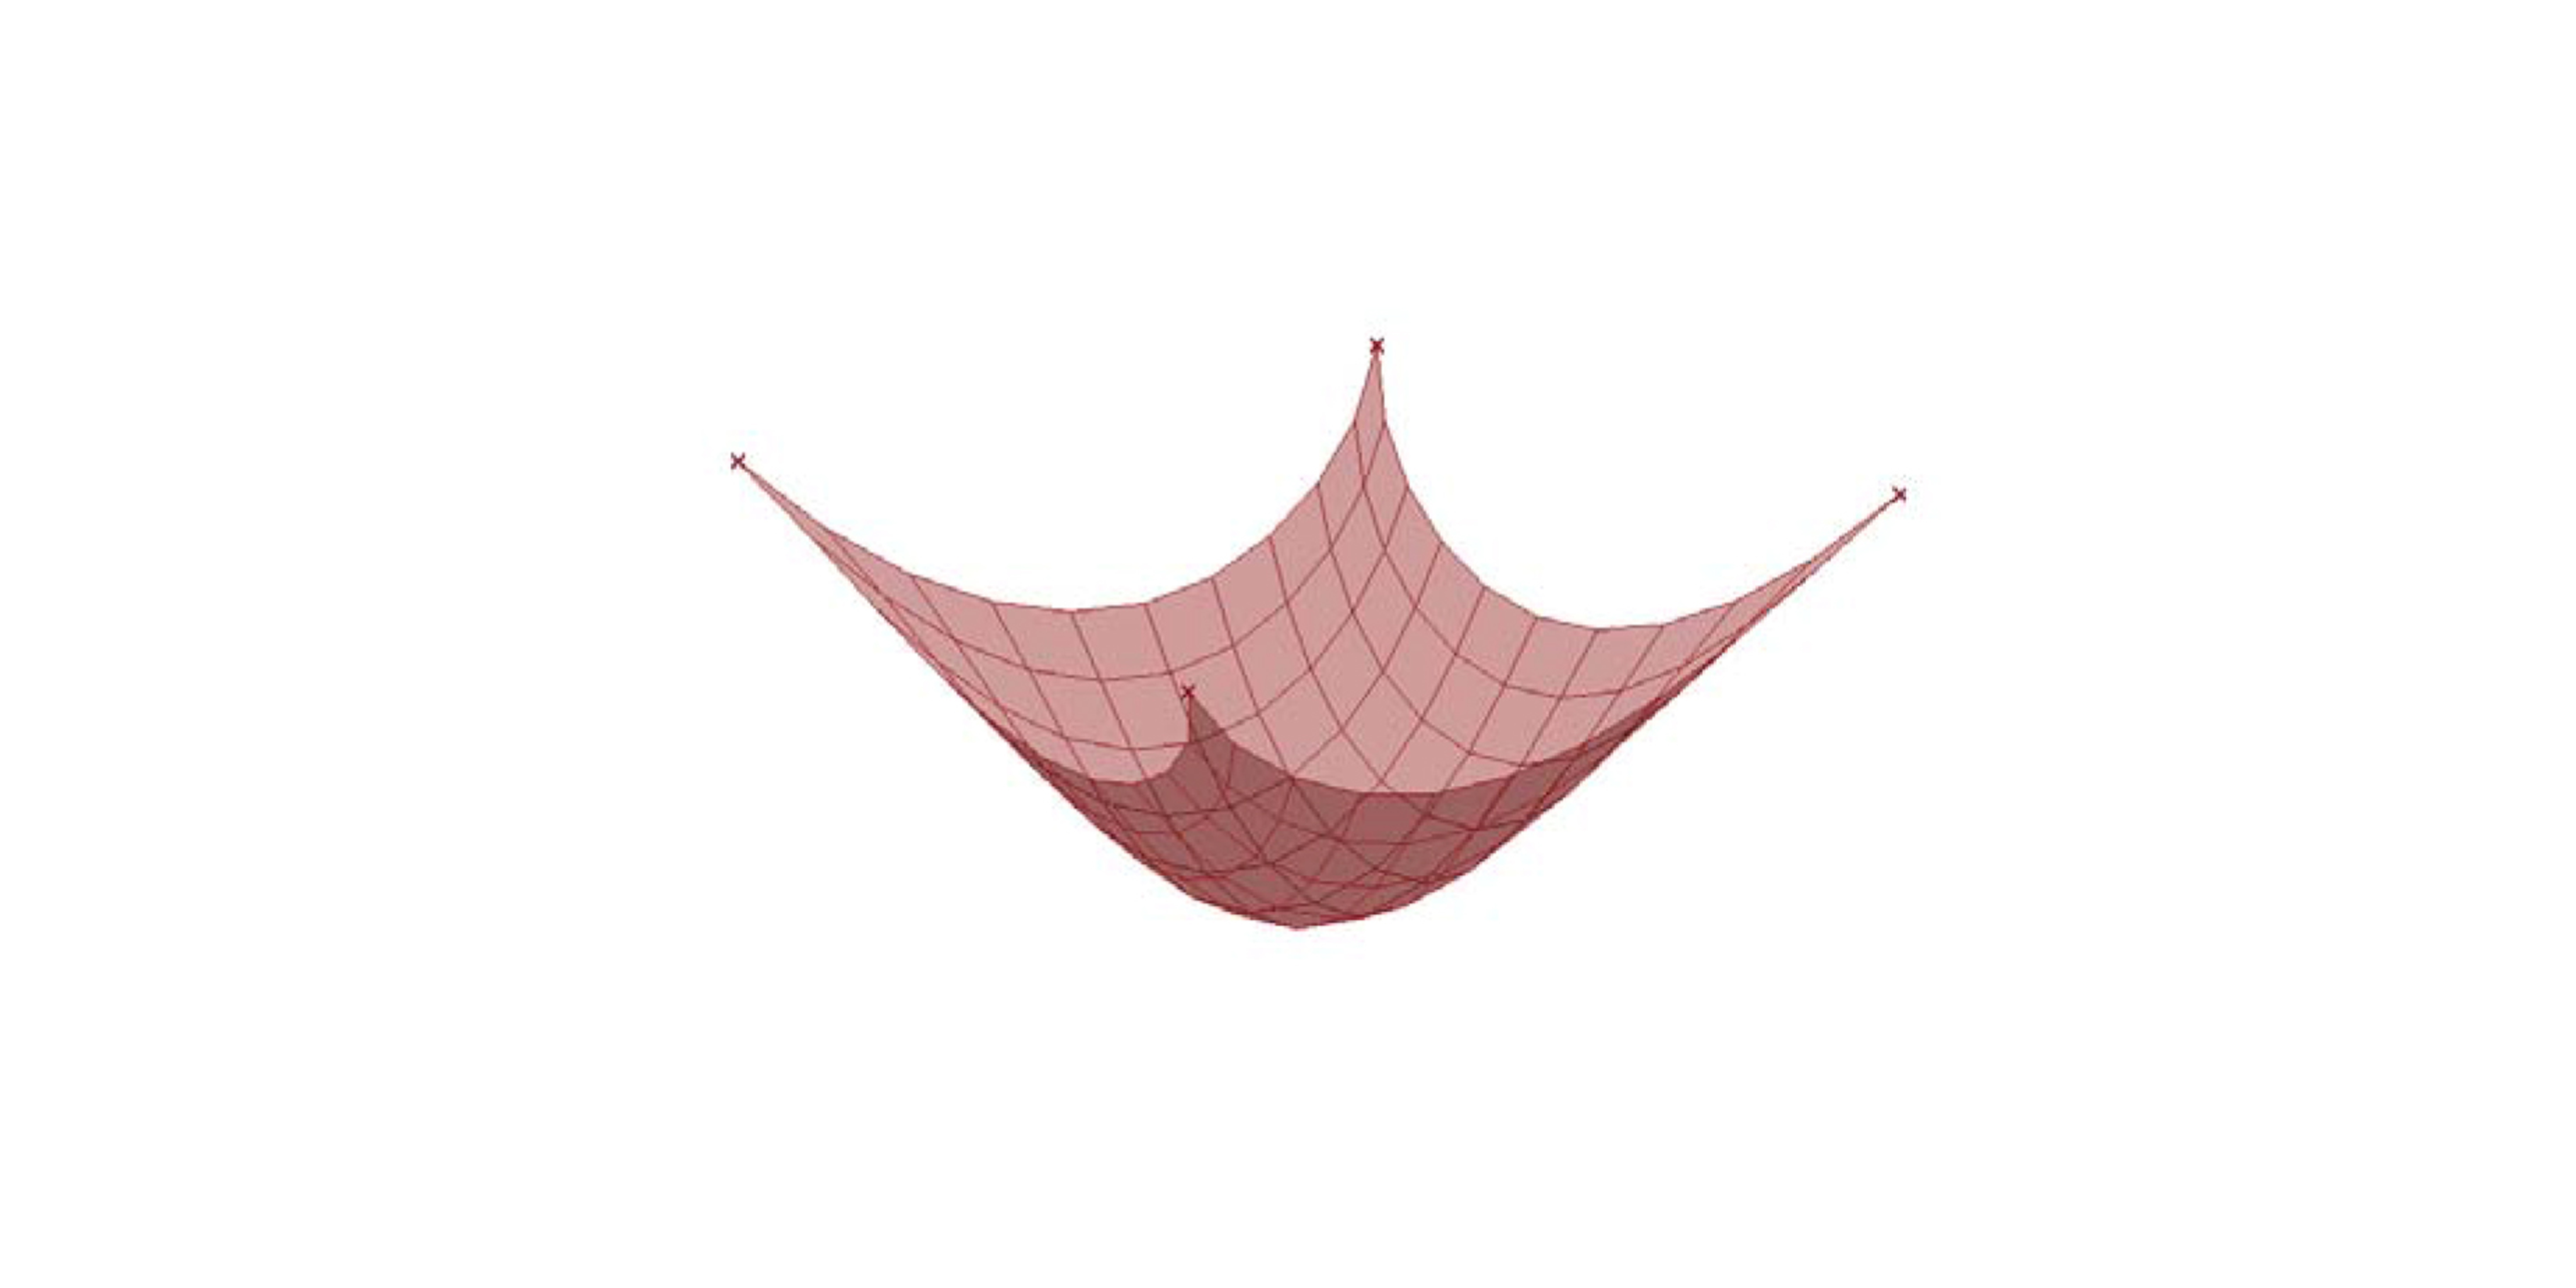
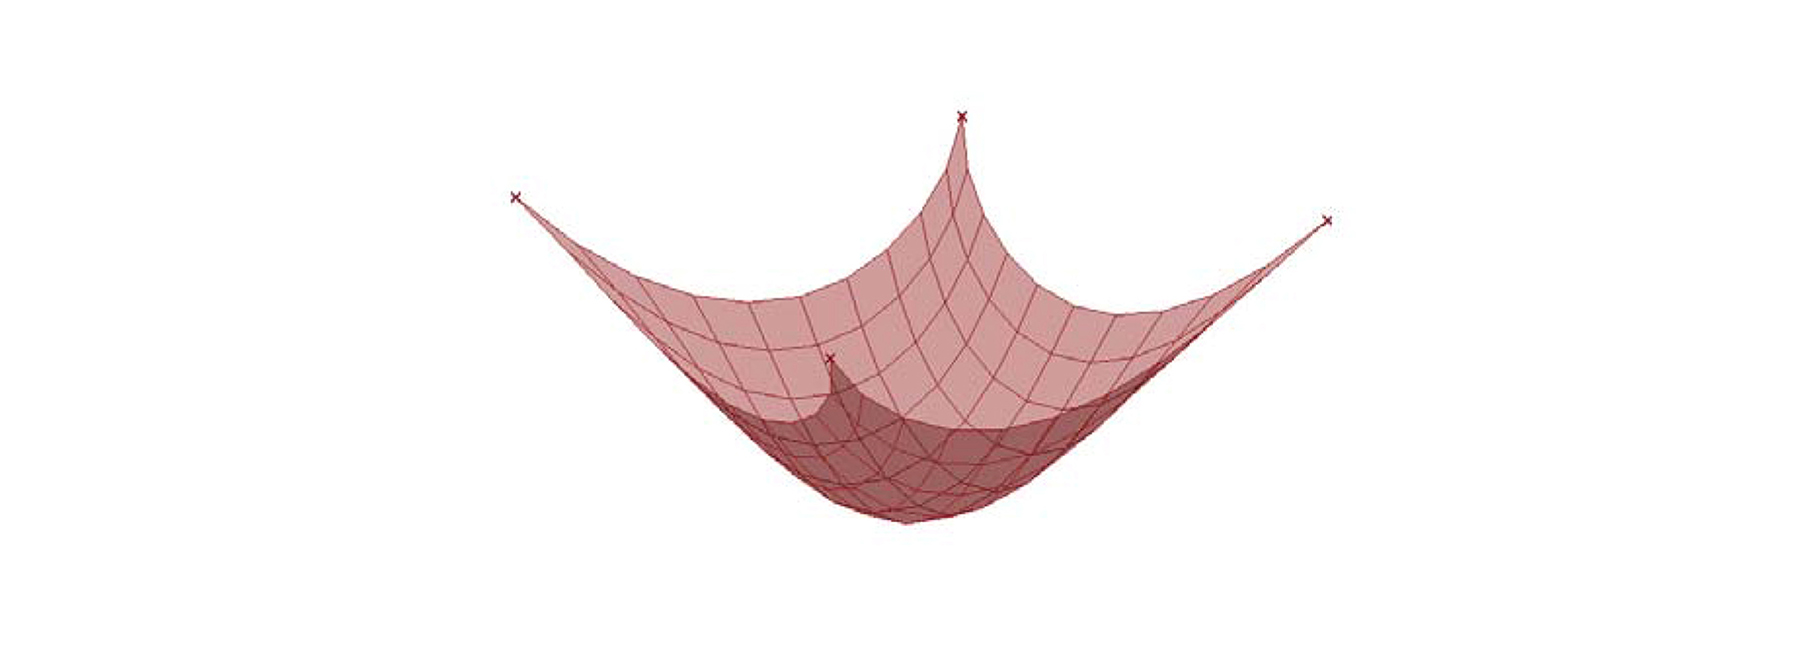
Catenary membrane using Kangaroo
The benefit of using Kangaroo over Grasshopper’s components is that we can create complex catenary structures. For example, it is possible to create a catenary membrane. In this instance, we need to use a mesh instead of a surface. This requirement is because Kangaroo does not process NURBS geometry. If NURBS geometry is required, use a mesh and rebuild it into a NURBS surface after the simulation.

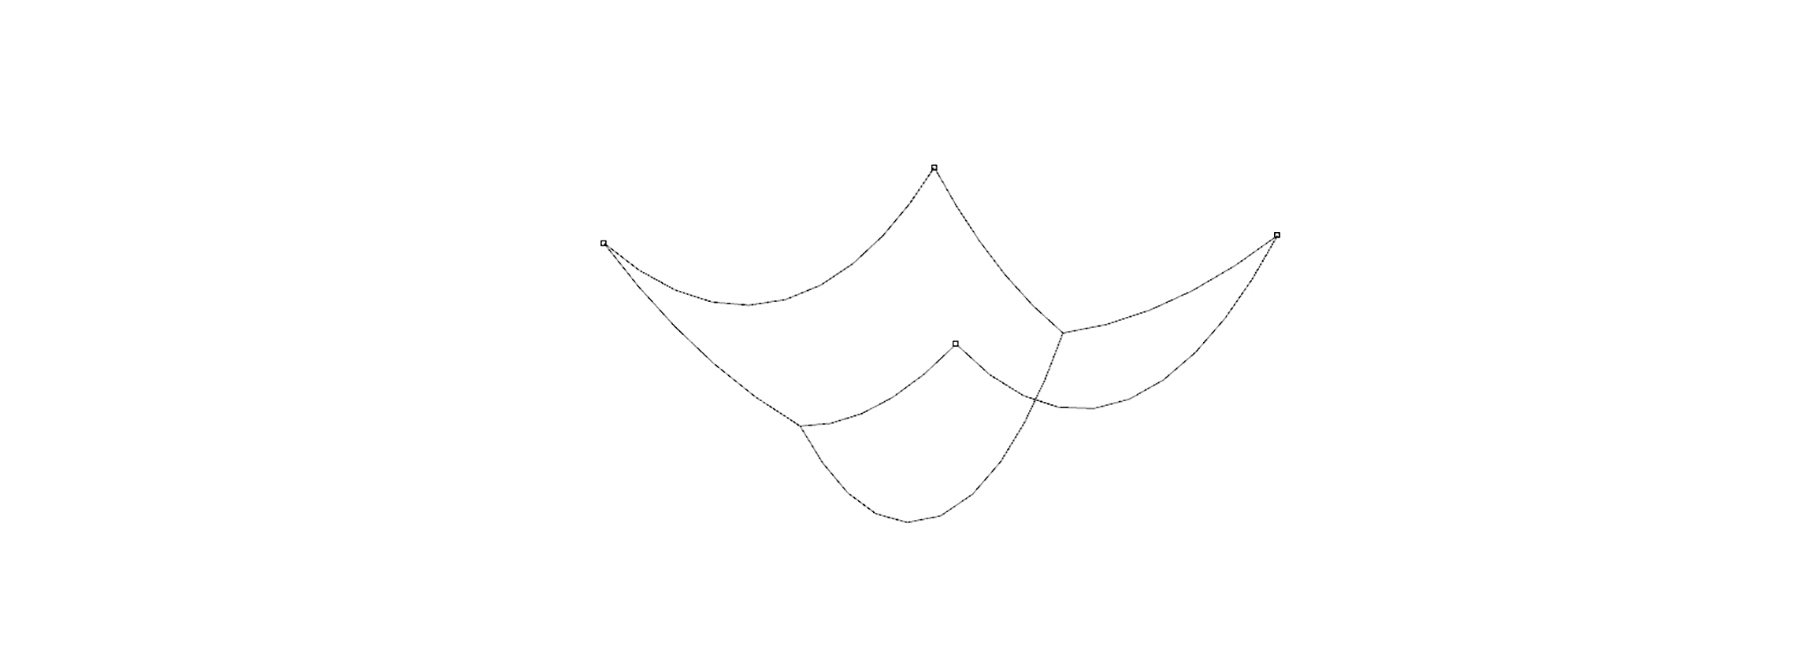
Nested catenary structures using Kangaroo
It is also possible to create nested catenary structures. This process entails hosting the anchor points of one chain to another chain. By default, Kangaroo joins overlapping control points. Therefore, to prevent the curve network from separating during the animation, ensure that that the start and endpoints of the nested catenary curve rest on the division points of the primary catenary.