
For years AEC professionals have struggled with interoperability between different software, particularly Rhino and Revit. This gave rise to a whole range of interoperability tools such as Flux and Konstru. However, it seems now that in one fell swoop, Robert McNeel & Associates have changed the game with the release of Rhino.Inside Revit.
Rhino.Inside is an open-source Rhino WIP project which allows Rhino and Grasshopper to run inside other 64-bit Windows applications such as Revit, AutoCAD and Unity. Yep, you heard right – Rhino and Grasshopper within Revit! This opens up enormous possibilities by combining two, best-of-class software. No longer is it necessary to replicate your Grasshopper scripts within Dynamo. They can simply be run within Revit using the Rhino.Inside technology.
This tutorial will demonstrate how you can install Rhino.Inside and reference Revit geometry to get you up and running.
Installation
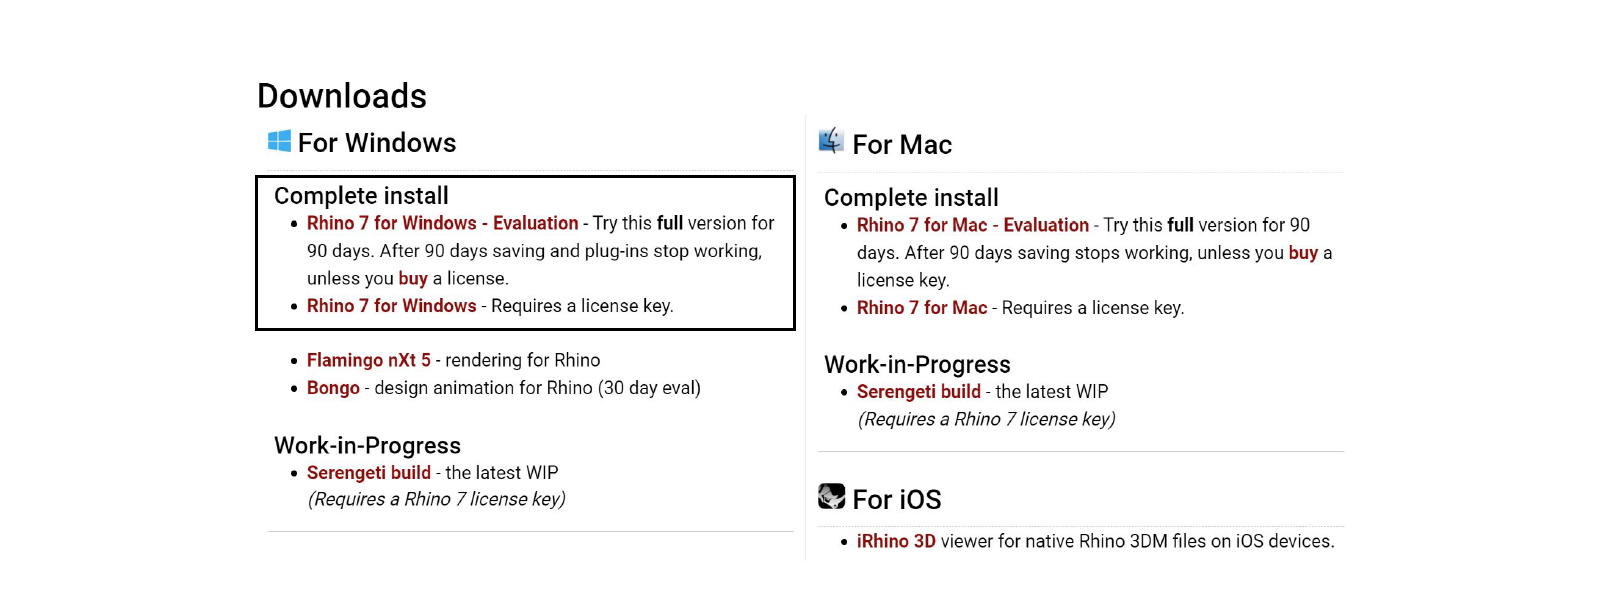
Step 1 – Install Rhino 7 or 8
Rhino.Inside Revit runs on top of Rhino 7/8 for Windows. If you don’t have a licence, you can install a full evaluation version for 90 days.
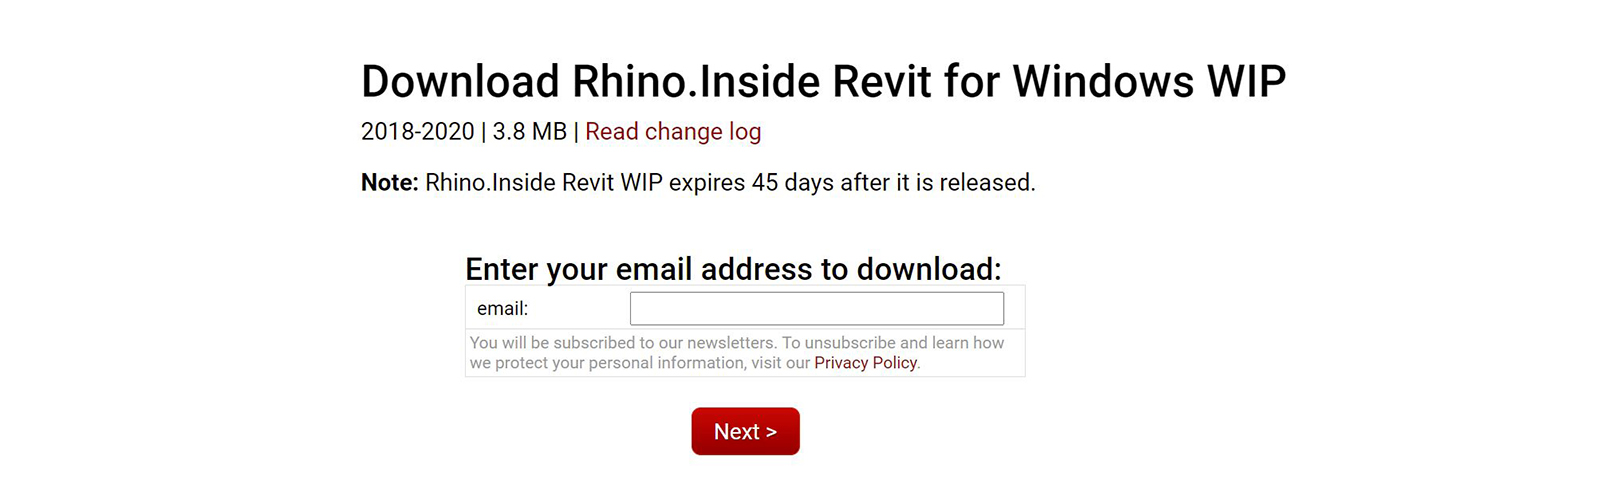
Step 2 – Install Rhino.Inside Revit
Download and install Rhino.Inside Revit using a valid email address. This version is the official public release, and it supports Revit 2018-2025.
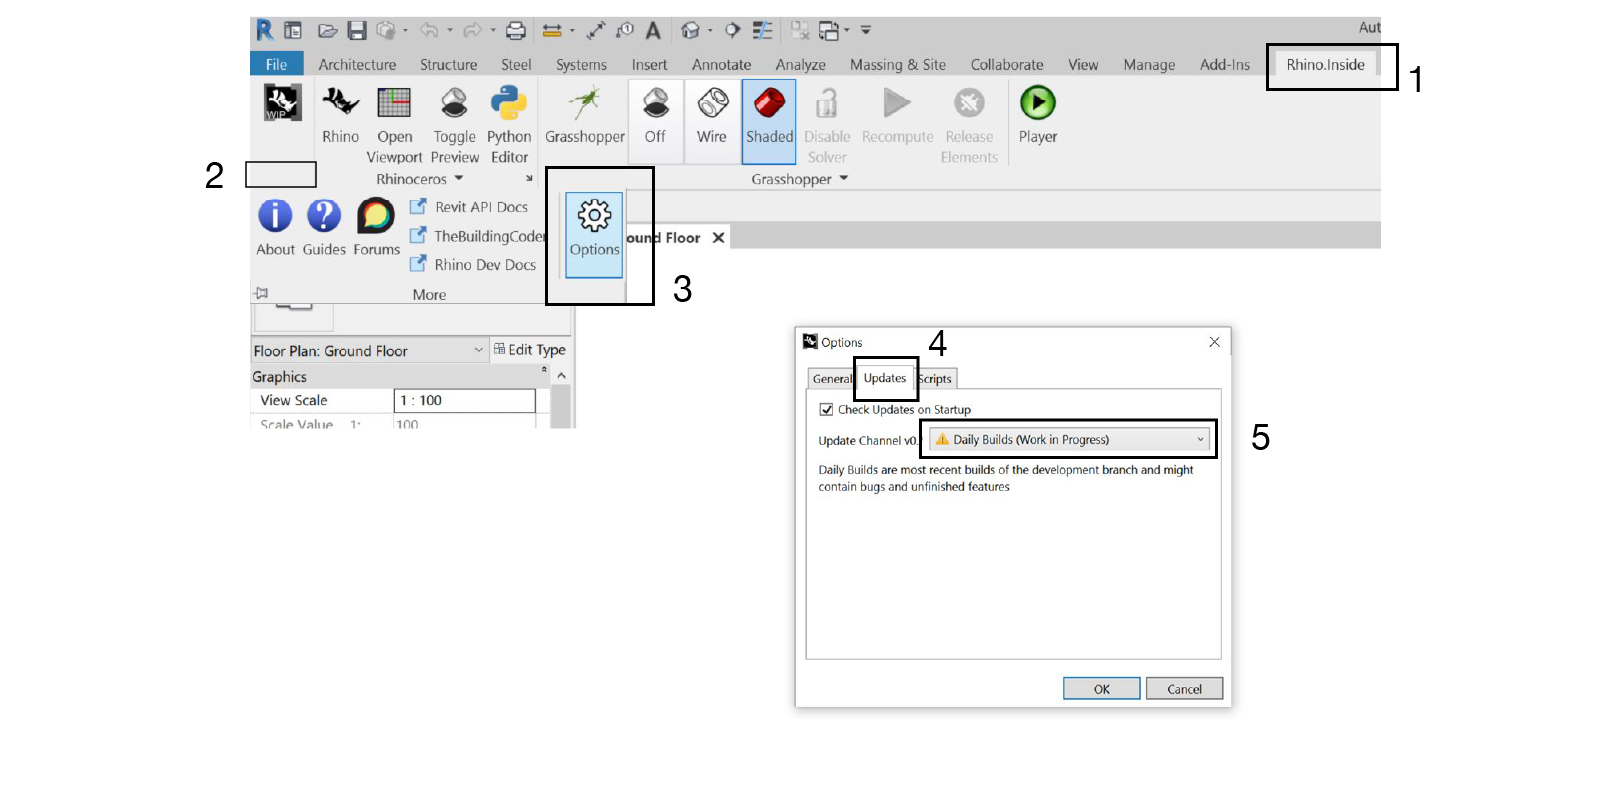
Step 3 – Enable Daily Build updates
In Revit, go to the Rhino.Inside tab > More > Options > Updates and select ‘Daily Builds (Work in Progress)’. Daily Builds are the most recent builds of the development branch and might contain bugs and unfinished features. However, on the flip side, because Rhino.Inside Revit is still developing, the daily build also fixes many bugs.
Version 1 of Rhino.Inside Revit now contains element binding, also known as element tracking. Now, if Grasshopper created that element, it will replace the Revit element, eliminating duplicates. This ‘remembering’ of elements occurs even after the file is closed – the same as Dynamo.
Step 4 – Install user objects (optional)
Since Rhino.Inside Revit is still in development, the full spectrum of components isn’t yet available. As an interim measure, McNeel has published various user objects to plug the gaps. These are Python components that need to be downloaded and placed in the user object folder. Once downloaded go File > Special Folders > User Object Folder and place the files there. Additional components should now be visible in Revit > Custom.

One of the most significant limitations of user objects is that they don’t have any element-binding. Unlike out-of-the-box (OOTB) components, this limitation means that duplicate elements will be created if the script is re-run. In the future, as more OOTB components become available, these user objects can be substituted out.
Launch
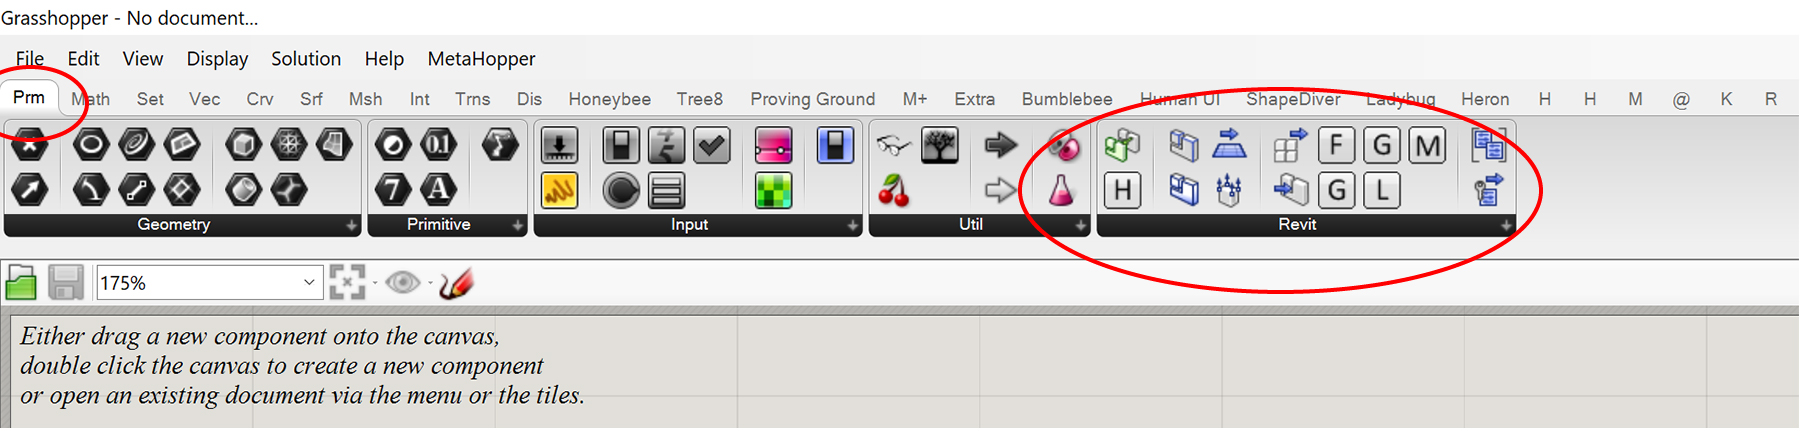
In Revit, go to the Rhino.Inside tab. Press the Rhino icon to launch Rhion.Inside Revit. This will activate the other icons in the ribbon. Next, press the Grasshopper icon to launch Grasshopper inside Revit. Within Grasshopper you should see Rhino.Inside Revit components added under the ‘Params’ and ‘Revit’ tabs. Note that these components are only visible from within Rhino.Inside Revit. If you open Rhino 7 independently, you’ll notice that these components are not available. Therefore, if you try to open a Grasshopper file in Rhino 7 after you have placed Rhino.Inside Revit components, you’ll receive an error saying the components are missing and the file won’t work correctly.

Rhino to Revit Interoperability
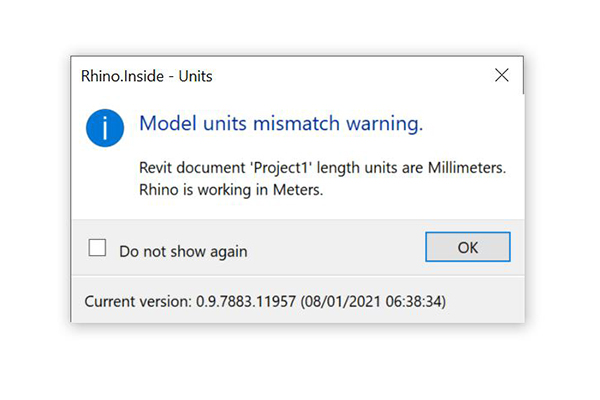
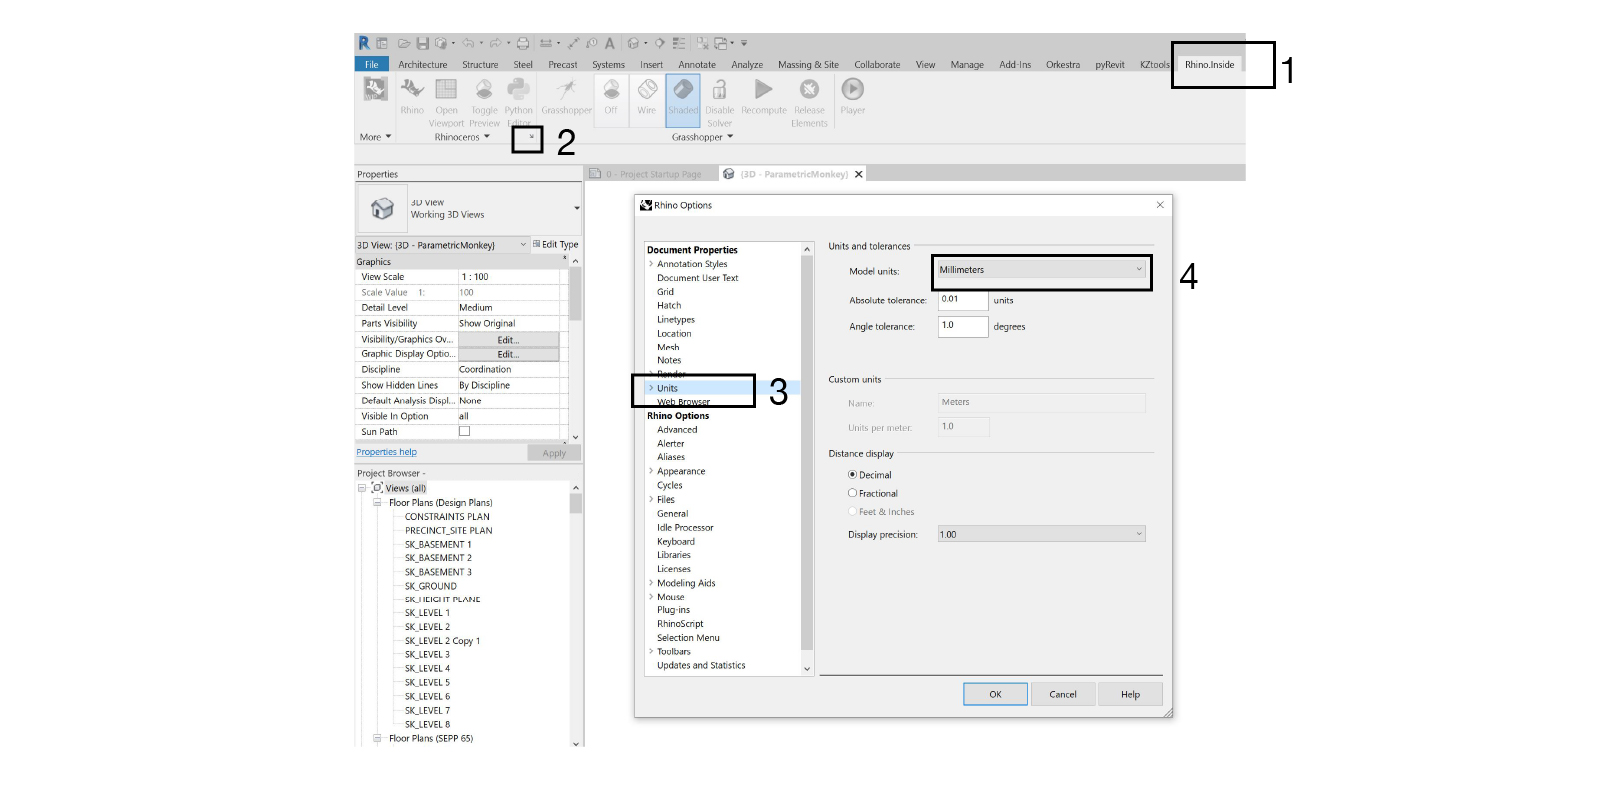
Before setting up any interoperability workflows, ensure that the Rhino and Revit units match.
For Revit, go Manage > Settings > Project Units, and change the Length format.

For Rhino, go Rhino.Inside > Rhinoceros > Rhino options (arrow in the corner) > Units, and set the model units.
To reference Revit elements into Grasshopper, go Params > Revit > Geometric Element. Right-click and select ‘set one Revit geometric element’ or ‘Set multiple Revit geometric elements’. If you selected multiple elements, ensure you press ‘Finish’ in Revit.


To convert the Revit element into geometry that Grasshopper can use go, Revit > Element > Element.Geometry.
Conclusion
It can get a little tricky managing three windows – Revit, Rhino and Grasshopper – at the same time. If one of the windows disappears, simply press the Rhino or Grasshopper button within Revit’s ‘Rhinoceros’ tab.
For more information about Rhino.Inside for Revit, refer to the documentation or check out our Rhino.Inside Revit for Dynamo users tutorial.


8 Comments
Boyan
Hey, speaking of “if one of the windows disappears… It`s not very usefyul when you are working on a grasshopper definition and need to compare something with Excel for instance. The moment you press on excel, or the file browser or whatever, the grasshopper window will minimize. Basically, if you are not in Revit, you can`t see GH.
Is this always going to be like this? Why not keep it stable and minimize when the user presses the minimize button. A little more control wouldn`t hurt anybody…
paulwintour
Hi Boyan.
These sort of comments are best if they are submitted to the Rhino Forum so that the developers can address any concerns you may have. But I don’t disagree with your comments.
https://discourse.mcneel.com/
anthony ch
Wonderful plugin
anthony
the best plugin that could be developed, thanks rhino
SYR
Hi, I downloaded the Rhino.inside.Revit and it is crashing every time I tried to open it. Any direction would be helpful at this point. Thanks!
paulwintour
Hi. These sort of comments are best if they are submitted to the Rhino Forum so that the developers can address any concerns you may have. https://discourse.mcneel.com/
faz
Hi, I’ve tried rhinoinsiderevit in revit 2021.0, It says expected version is 2021.1 or above
but as I understand this will support revit versions from 2018-2022. How can I fix this issue. Please advise. Thanks in advance
Paul Wintour
Hi Faz. It should work for Revit 2021. But this question is best directed at the McNeel team via their forum: https://discourse.mcneel.com/